
How to Easily Draw & Measure Your Space for Interior Design
A Step By Step Guide With Photos Plus How It’ll Save You Time And Money

Credit: Vibe Is Bright
Let me just go ahead and say it. Measuring your space is probably the least exciting part of interior design. But it’s also one of the most important parts of the process. Basic measurements of your space will help you and your interior designer figure out the best layout for your room.
Not only that, one of the biggest time wasters that unfortunately happens way too often is someone buying something that’ doesn’t fit in the space. Ever seen a sofa that looks stuffed in the space? Or a rug that looks puny next to the sectional? Returning furniture and decor is a hassle at best, nightmare at worst, and if you’re buying second hand things, there’s a high likelihood you can’t return it at all. So measuring your space before you get started can save you both time and money.
Additionally, if you’re working with a designer virtually, it can be really hard to tell from photos what your space actually looks and feels like. Measurements are a really important tool in communicating the realities of your space with your interior designer.
So let’s go through this together, step by step, and learn how to easily draw and measure your room, so you can get to the fun stuff — design!
Credit: Vibe Is Bright
What You’ll Need
— Several sheets of blank or grid paper (8.5 x 11 is fine, but bigger is better)
— Tape measure with 1/8” increments (see tips)
— Pencil with eraser
— A friend or 2
— Good lighting for great photos
Before You Begin
Don’t worry if these aren’t drawn to scale or look a little messy. These drawings are meant to help you and your interior designer get a lay of the land. A carpenter or an architect will need different or more information than you, and they should be responsible for getting their own measurements to do a good job on their own.
As a designer, I always do a rough sketch and add measurements to it. Then I go back and make it neater and to scale again on paper or using a 3D modeling software like SketchUp. If you’re a Virtual Design client with me, I’ll take your drawings as is, then redo them in a way that works best for our project. I’m absolutely not looking for perfection!
Credit: Vibe Is Bright
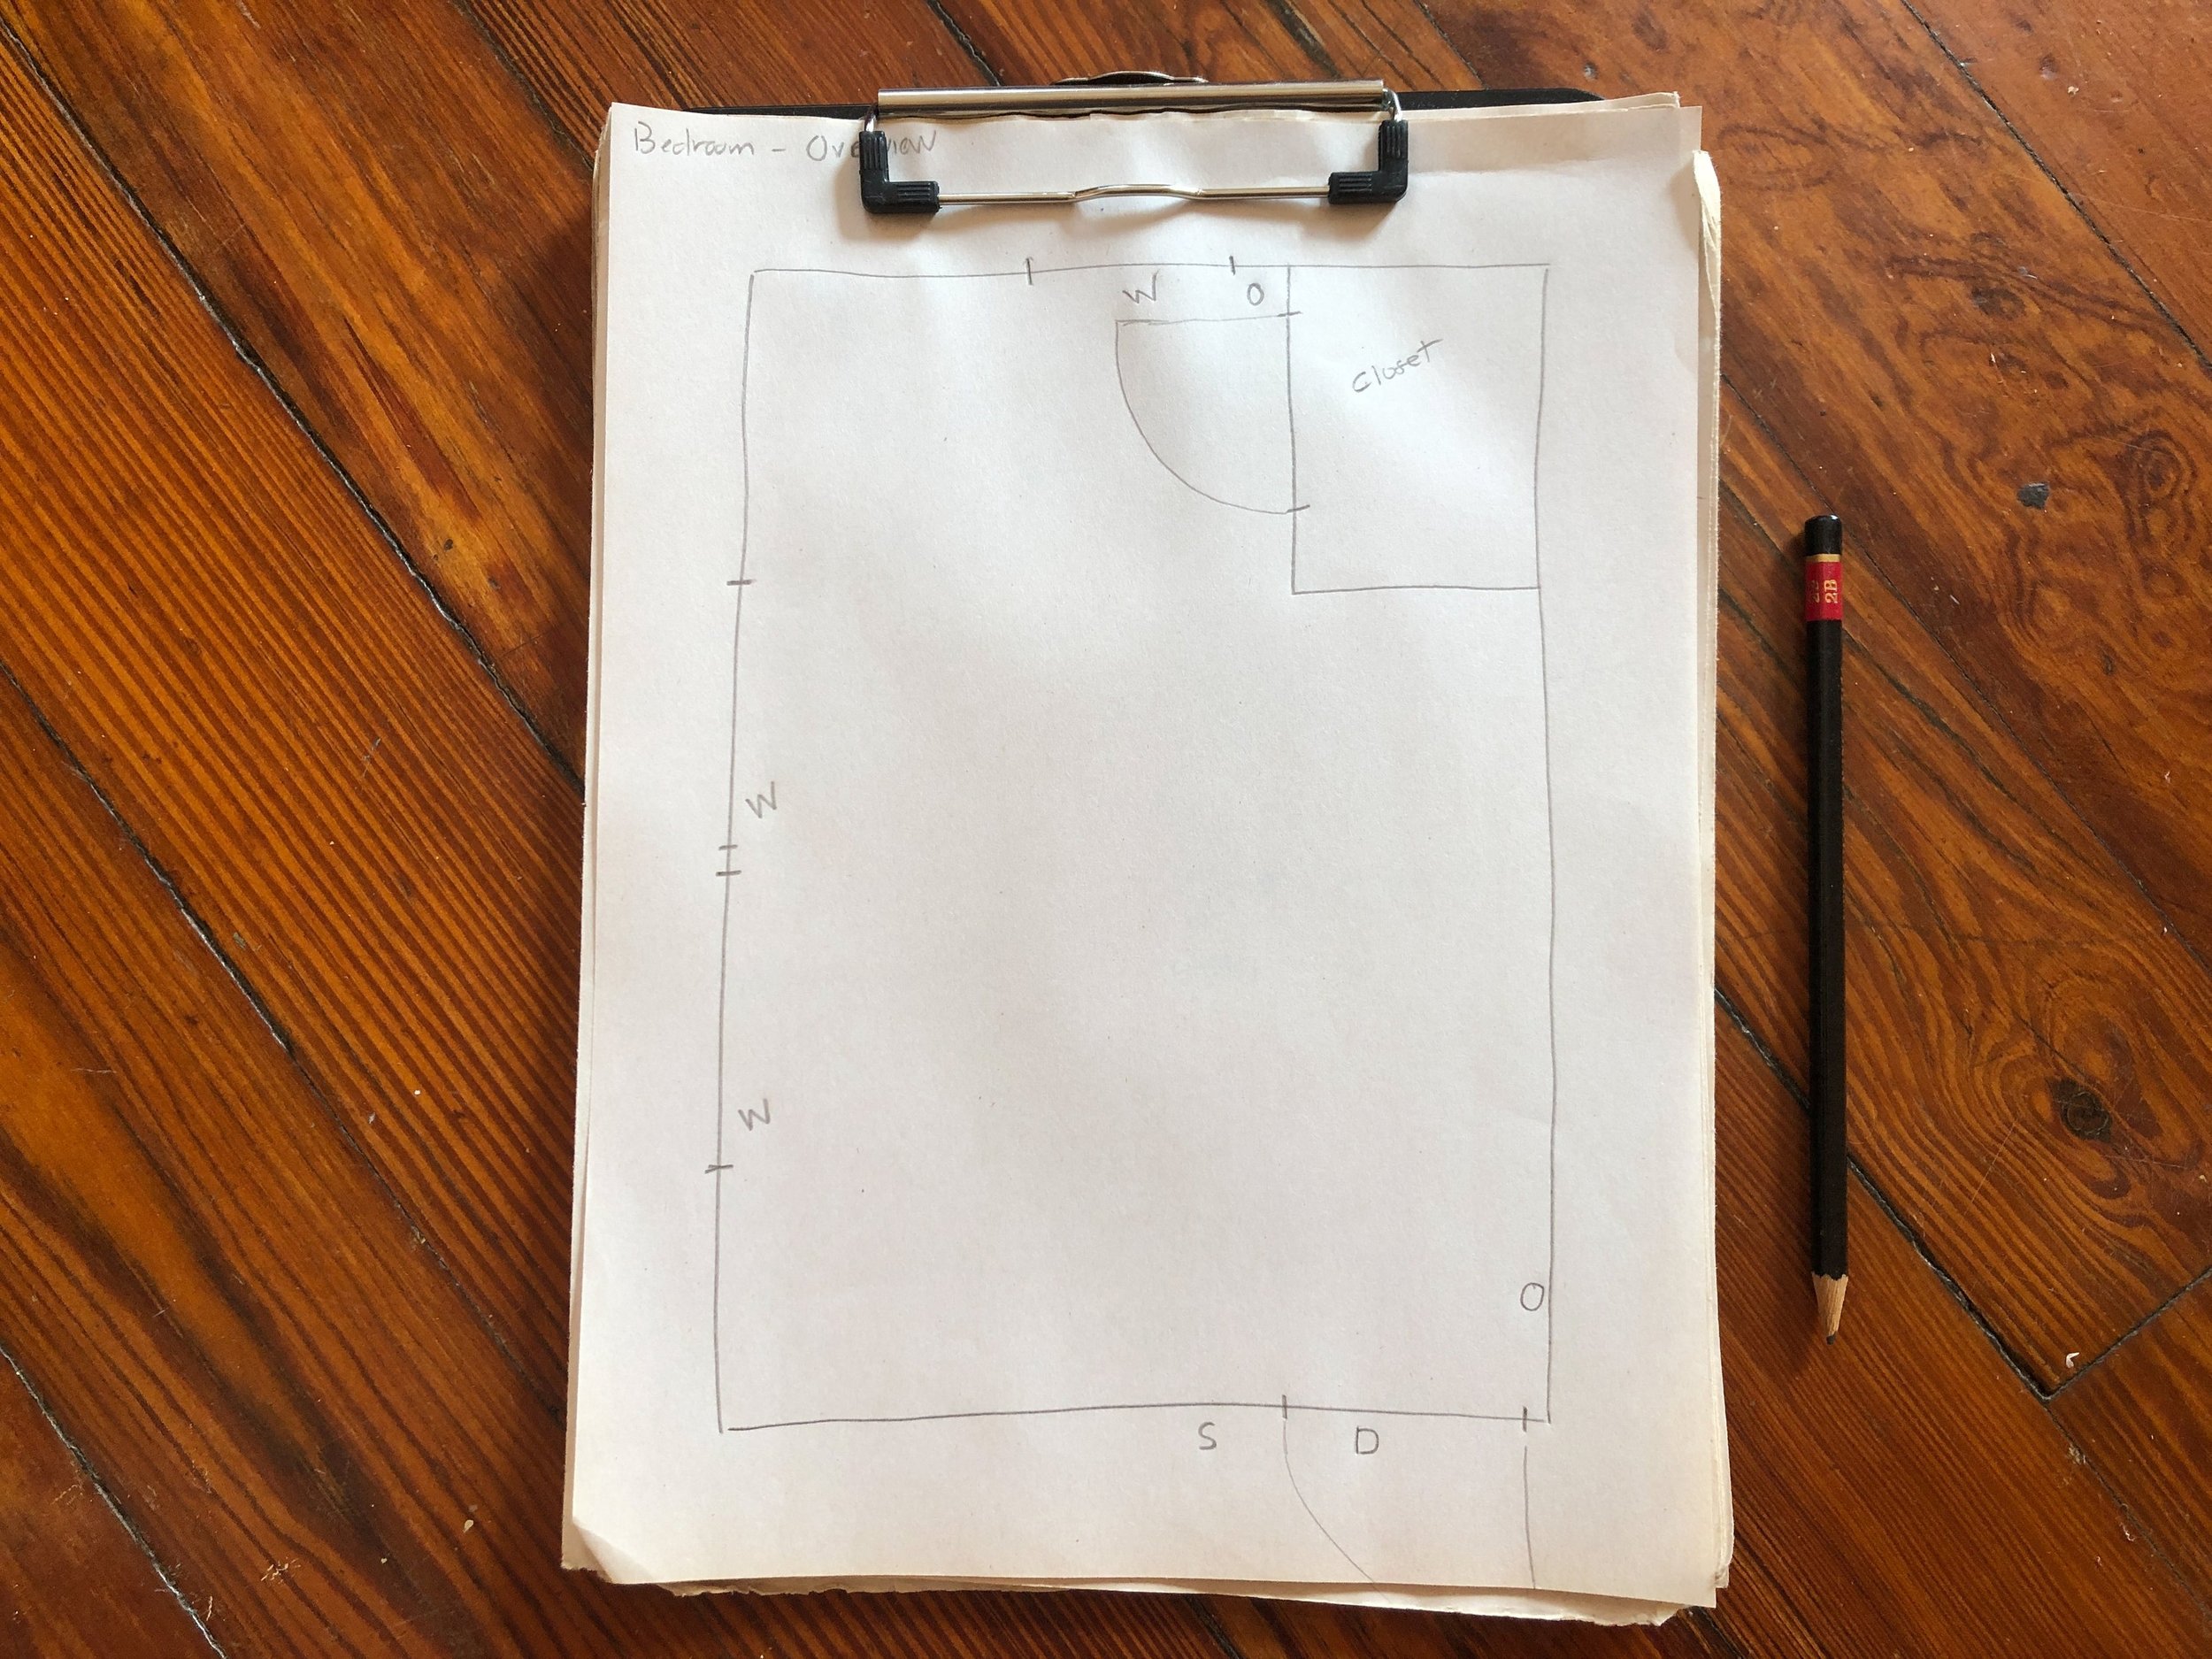
Create a General Overview of the Space
Name a new sheet of paper “Room Name - Overview.”
Notice the shape of your room. Is it rectangular? What’s the long side? Is it more of a square? Some other shape? Draw this shape on paper as big as you can.
Make note of any fixed structures in the space. Are there any closets? Nooks? Walls that protrude? Fireplaces? Radiator? Draw their shapes in the room and label what each one is.
Every room has key features that support how we function in the space. How do I enter the space? How do I charge my phone? It’s easy to overlook these mundane features but they are an important part of the design, so let’s include them in our drawing.
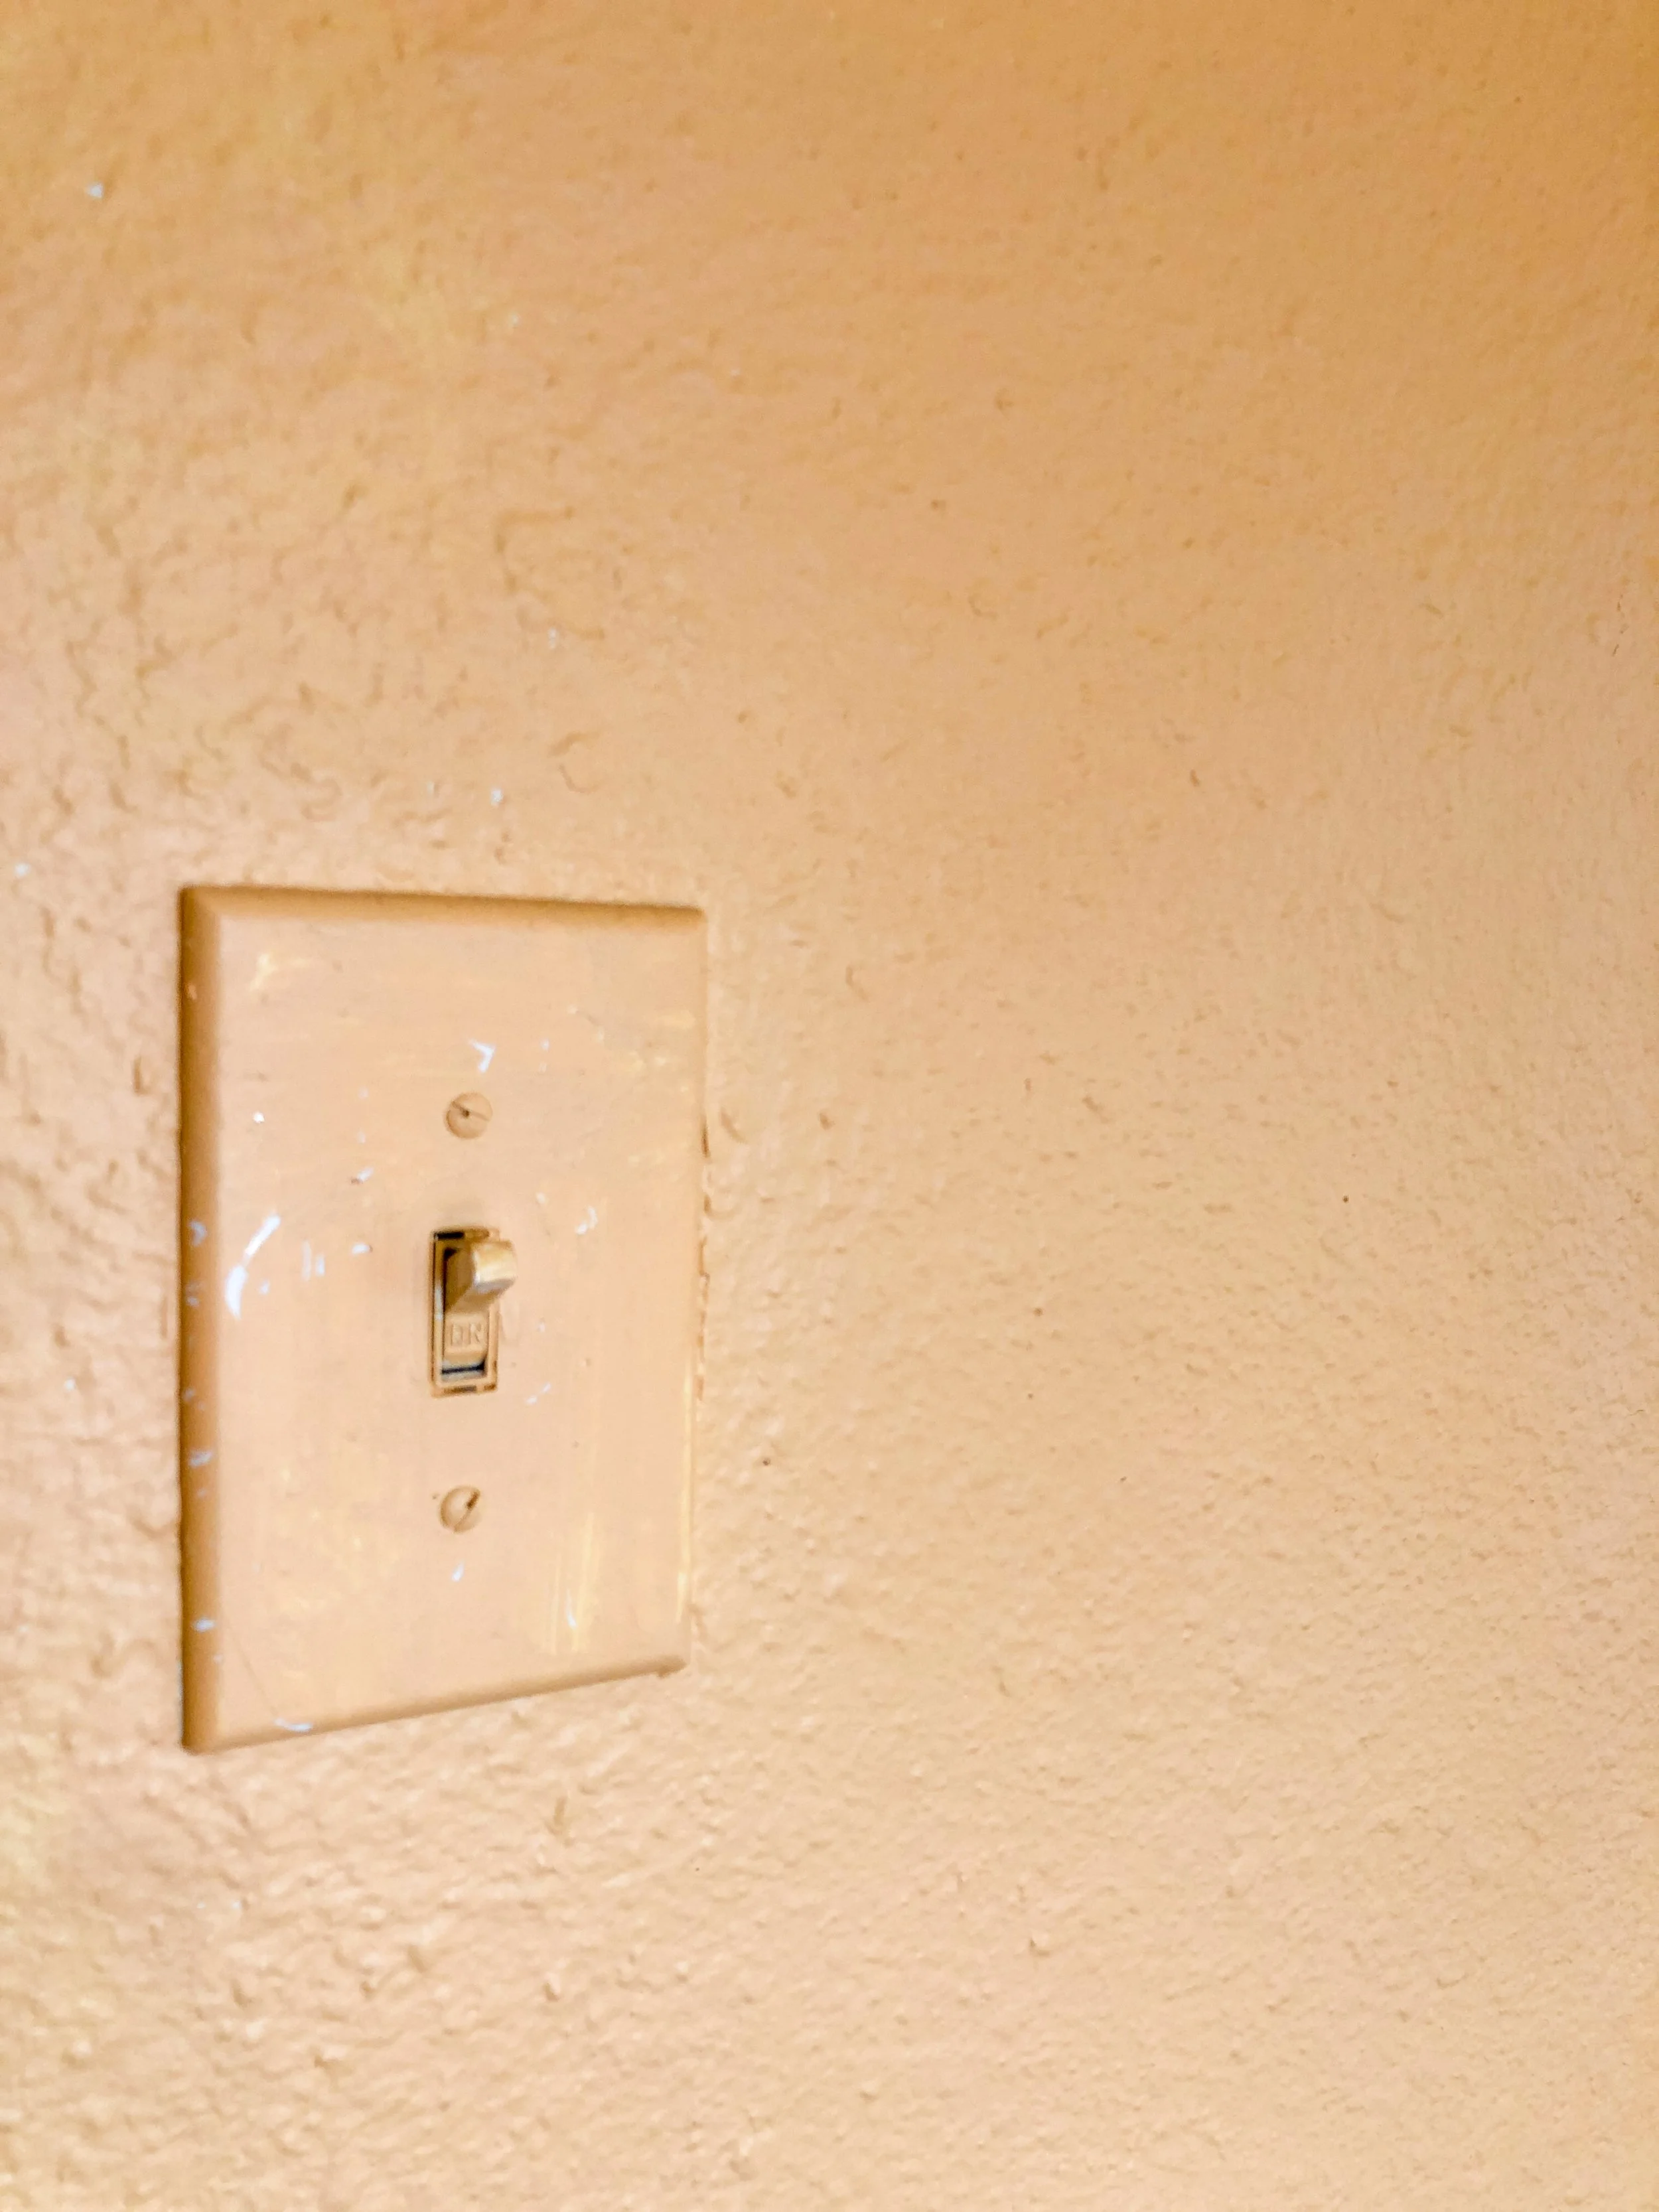
Mark the key elements of the space. Make note of all windows (W) and doors (D), light switches (S), power outlets (O) and air vents (V) with their corresponding letter.
Now that you have a general overview of the space with key features, grab a new sheet of paper to write out the measurements.

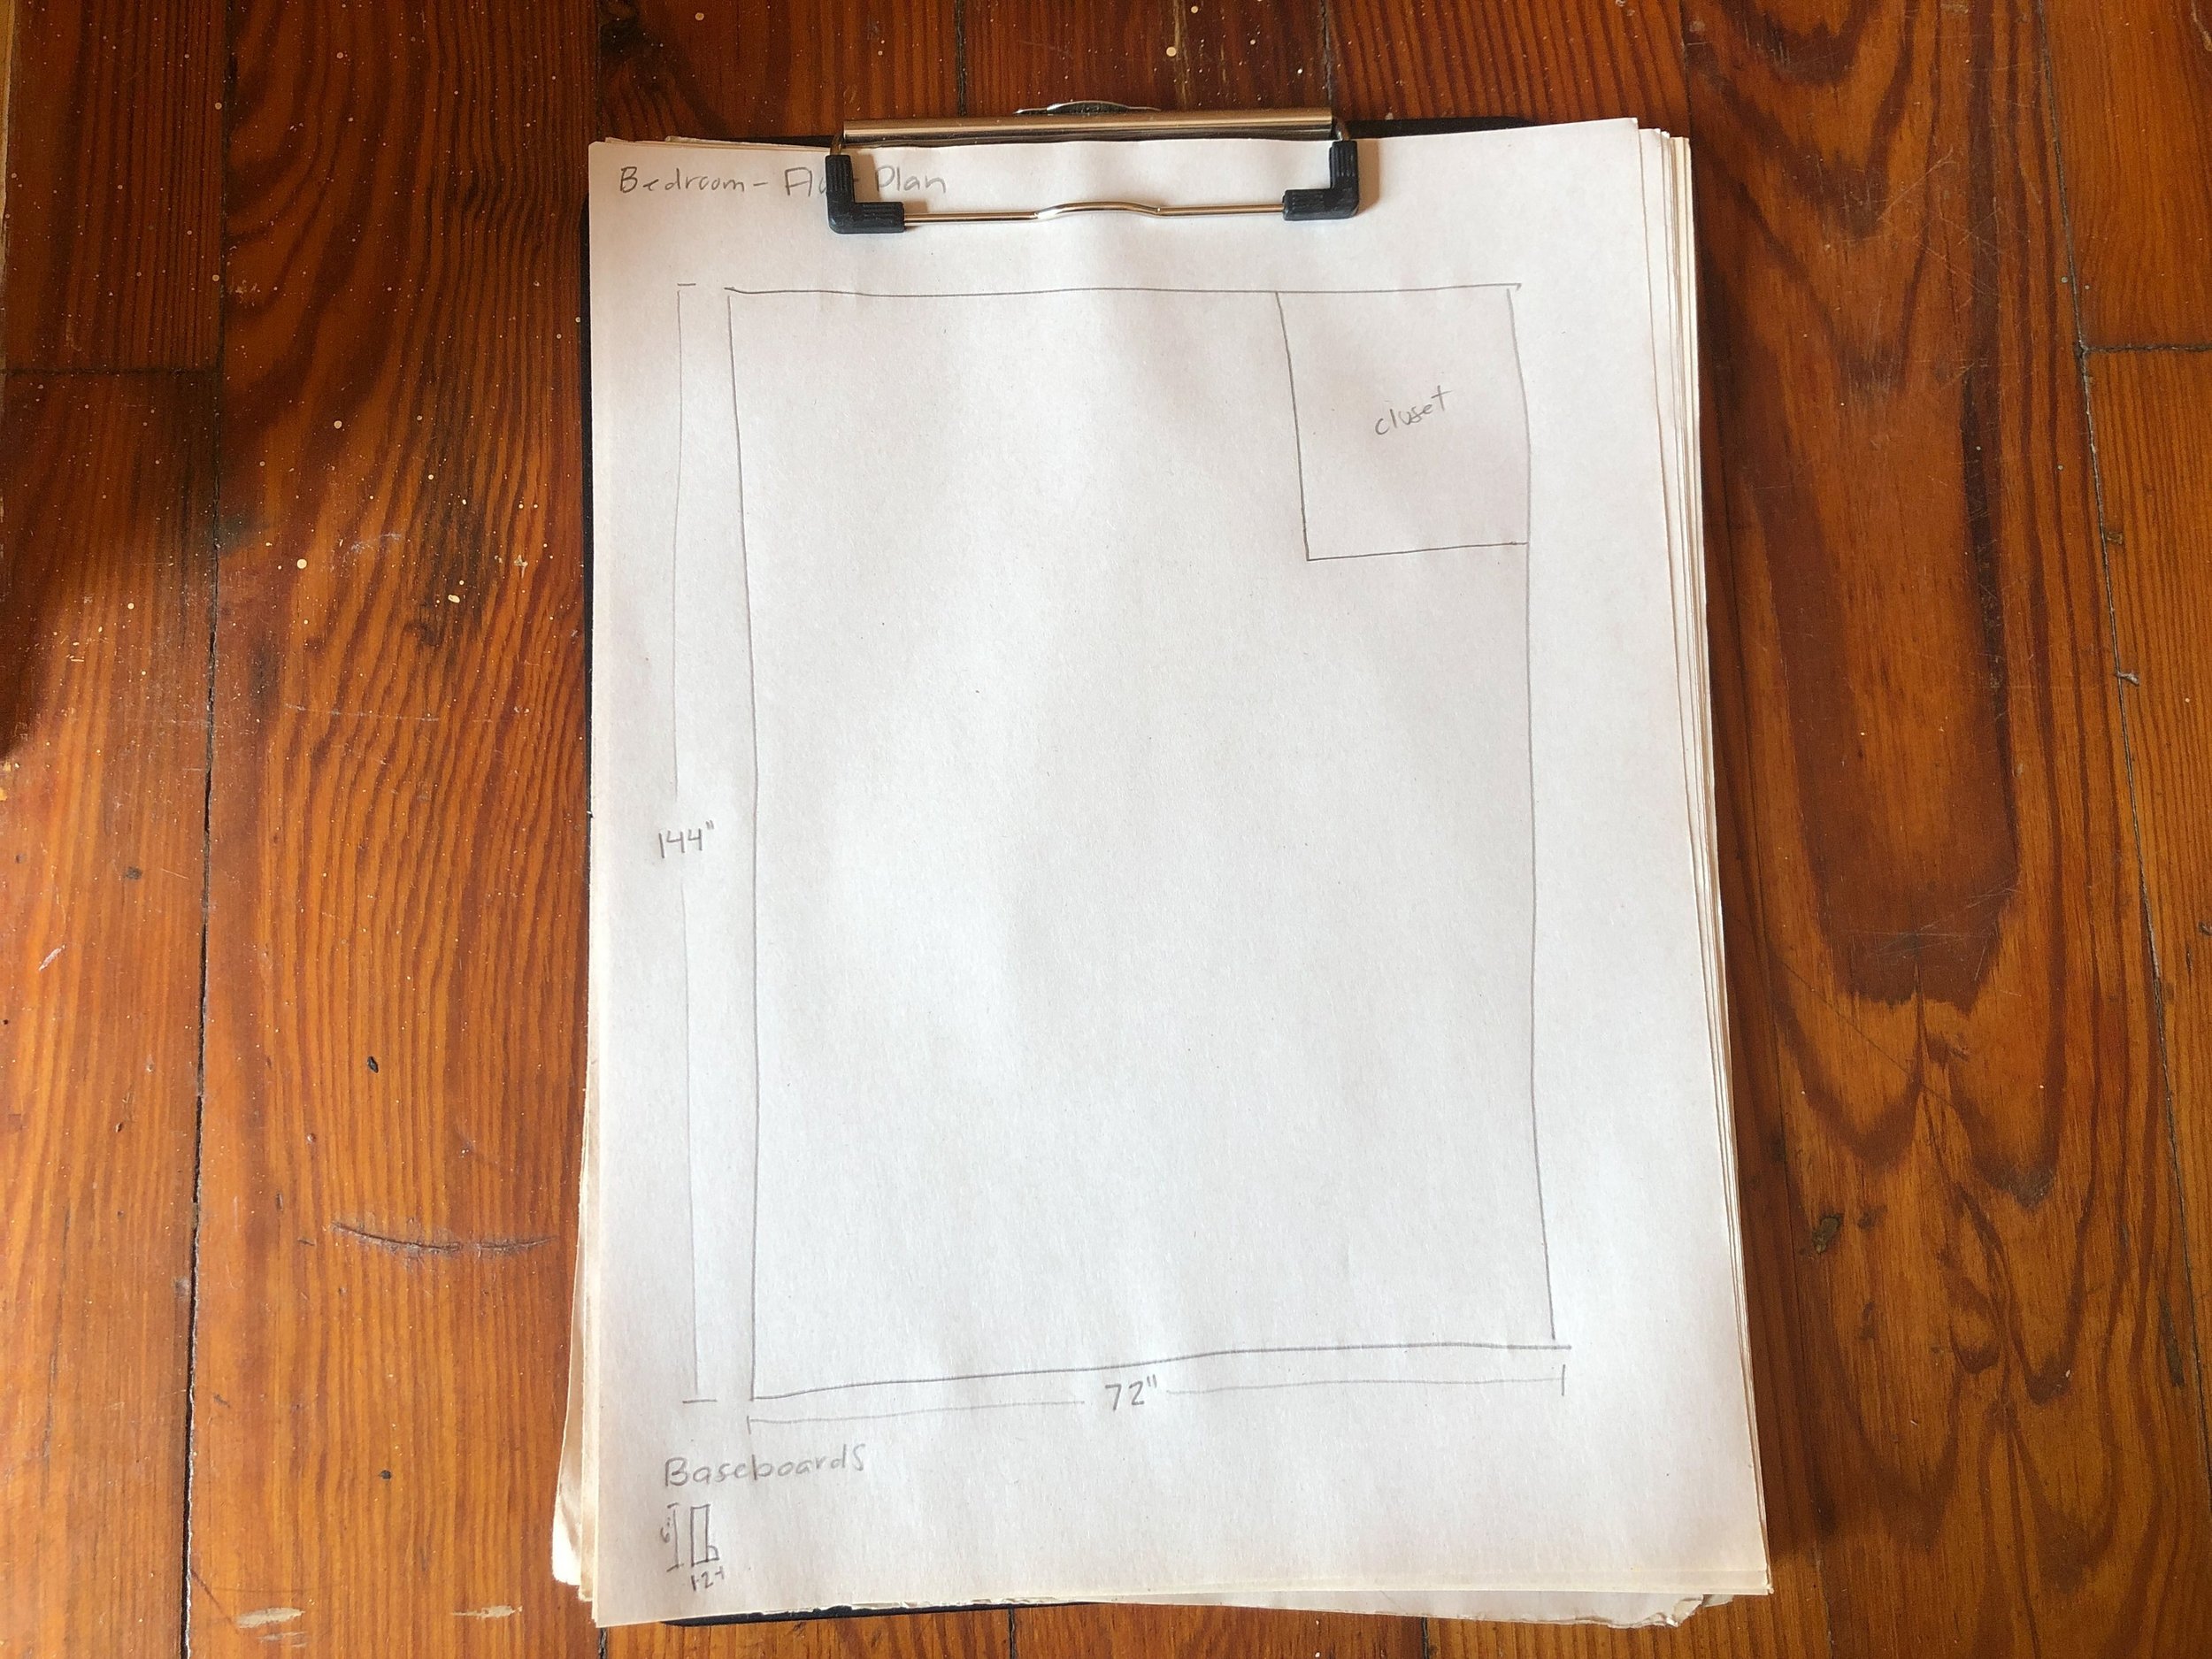
Create a Floor Plan with Measurements
This is where it’s helpful to have an extra set of hands. One person can call out the measurement while the other person records it.
Name a new sheet of paper “Room Name - Floor Plan.”
Redraw the outline of the room leaving a 1” margin all the way around.
Credit: Vibe Is Bright
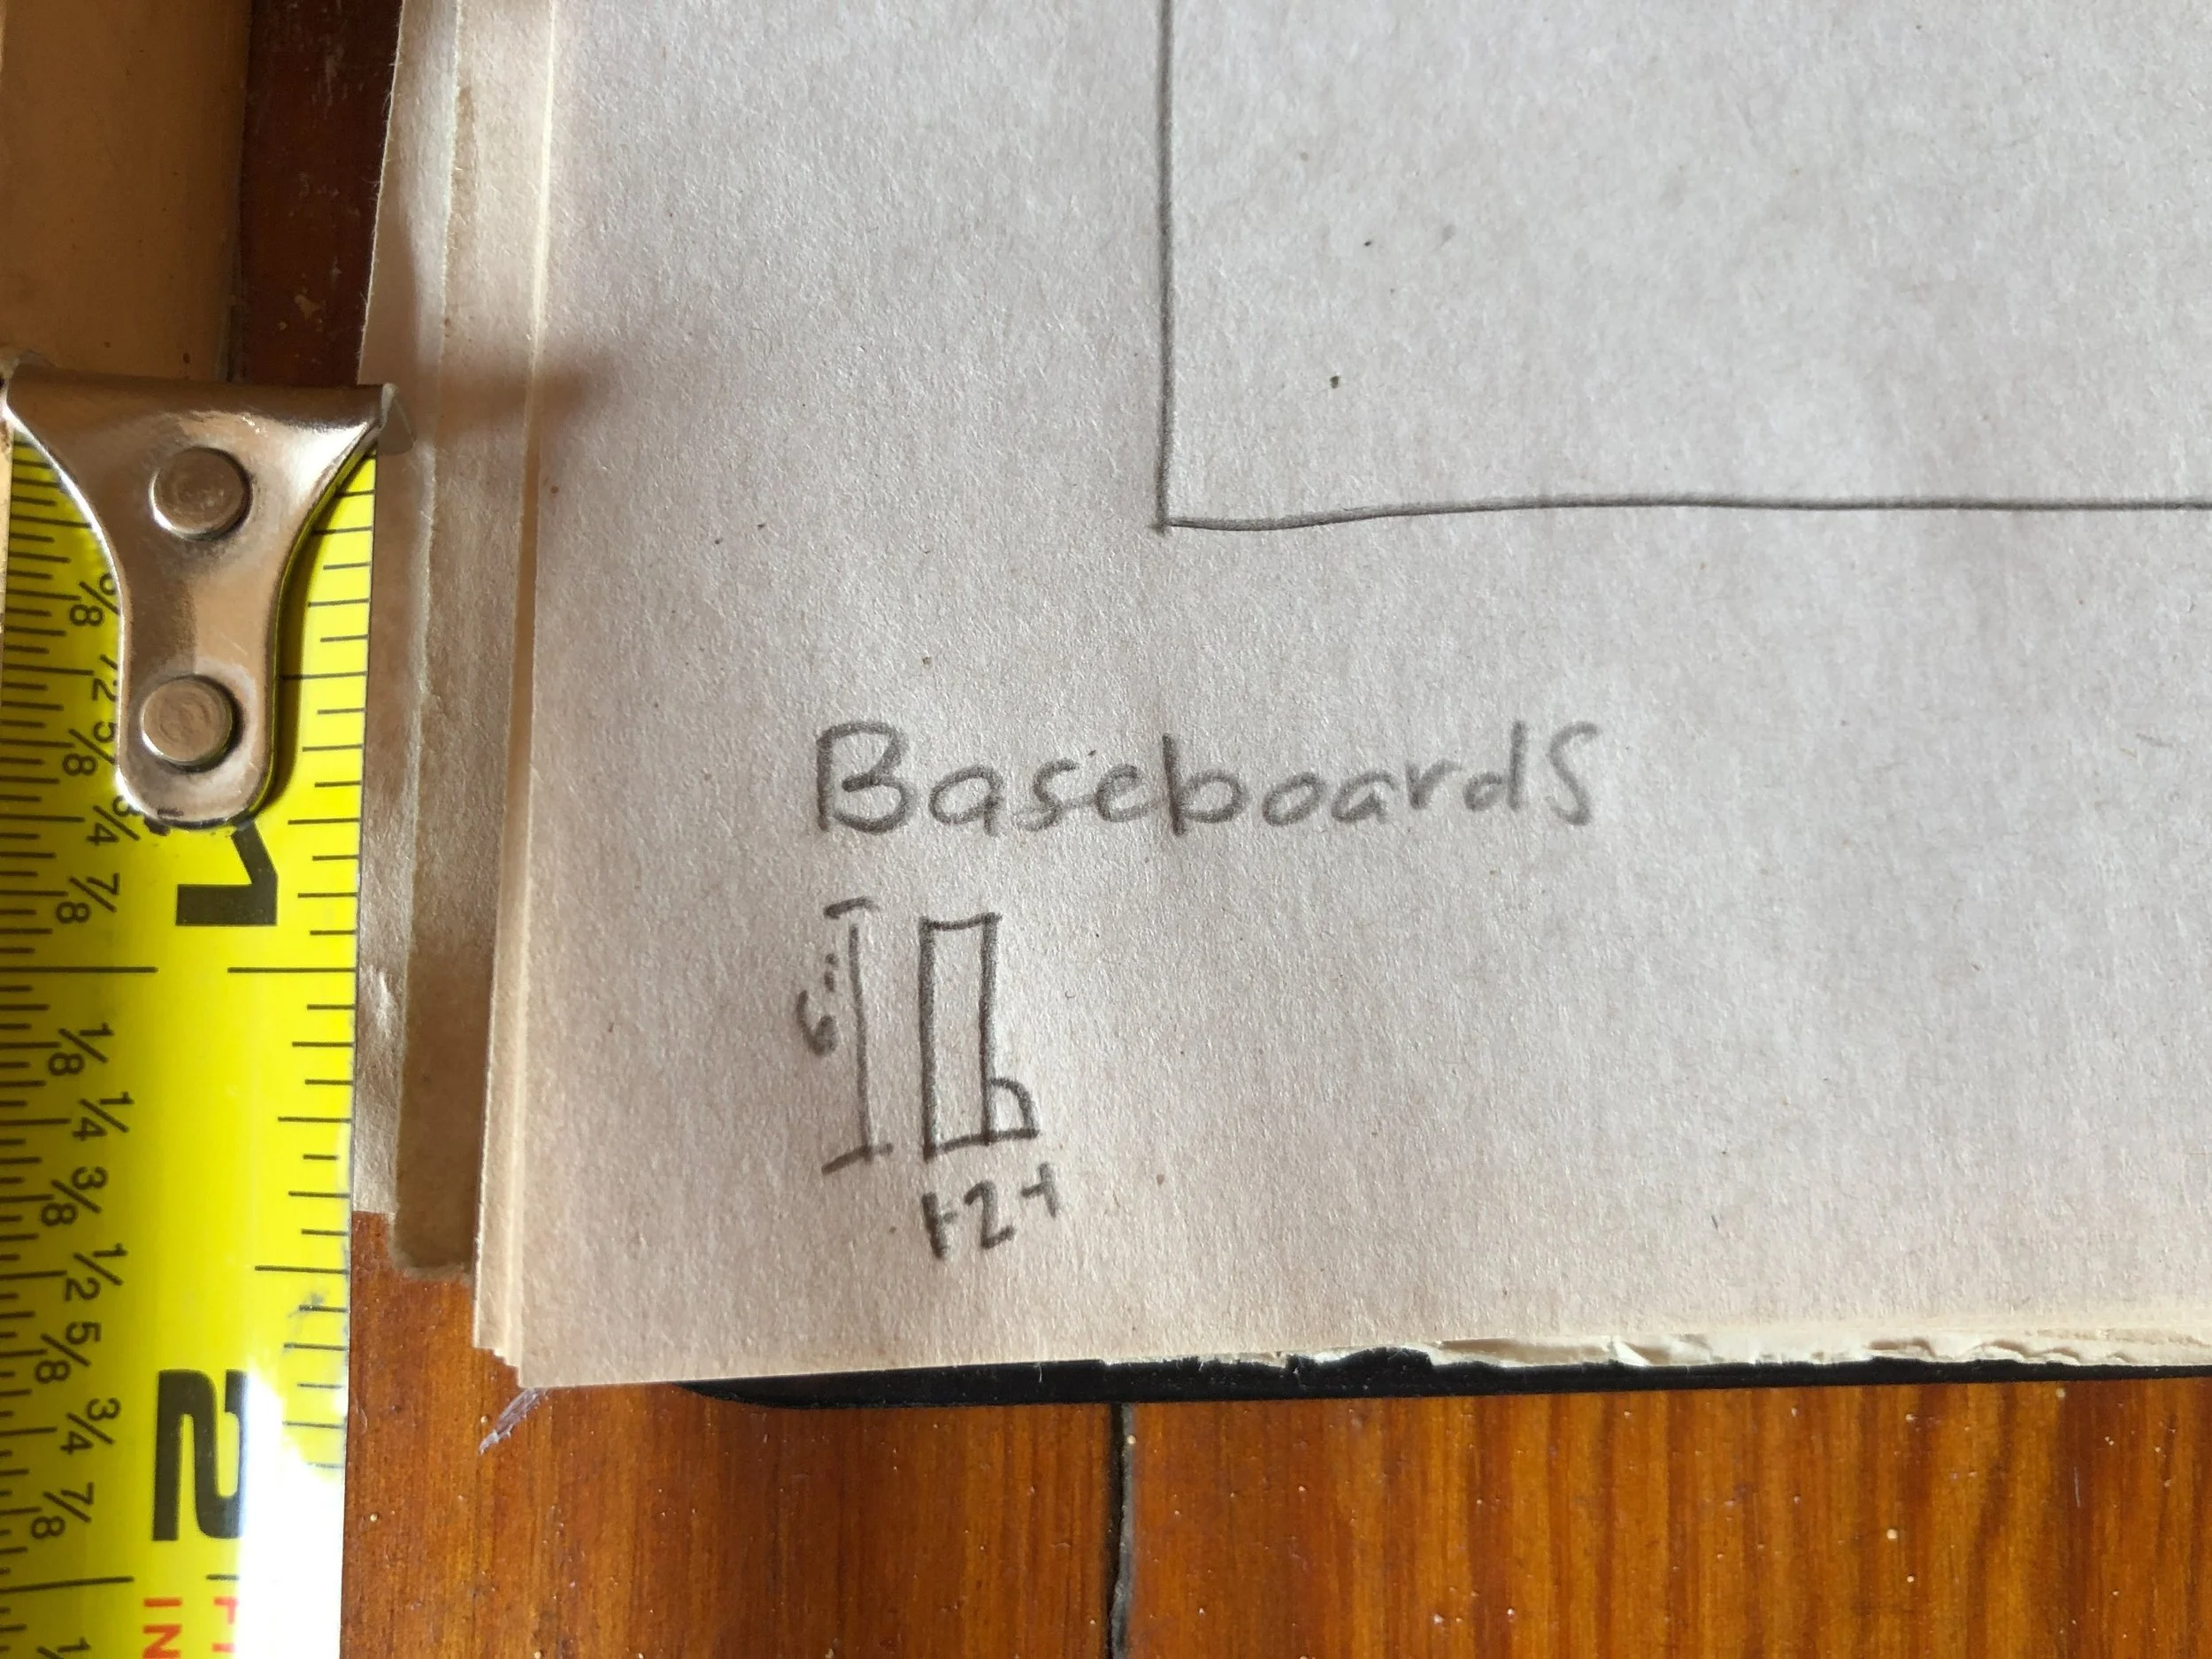
Measure Baseboards
Your room may have baseboards. These are planks that cover the perimeter of the walls touching the floor. When you have baseboards, the wall to wall measurement along the floor will be less than wall to wall at eye level. Because they are three dimensional, they make a difference in how furniture fits in the space.
Make note of any baseboards. Do they span the entire room?
Measure the depth and the height of them at their widest point.
In the 1 inch margin, add a note with the measurements of the baseboards.
Credit: Vibe Is Bright
Measure The Distance Between Walls
Since you already made note of the baseboard measurements, let’s disregard them and measure the distance between walls without them.
Measure the length of each wall from corner to corner. Don’t assume parallel walls are the exact same length. Measure each one individually. Write these measurements in the 1 inch margin. Our smaller measurements will go inside the drawing.
Credit: Vibe Is Bright
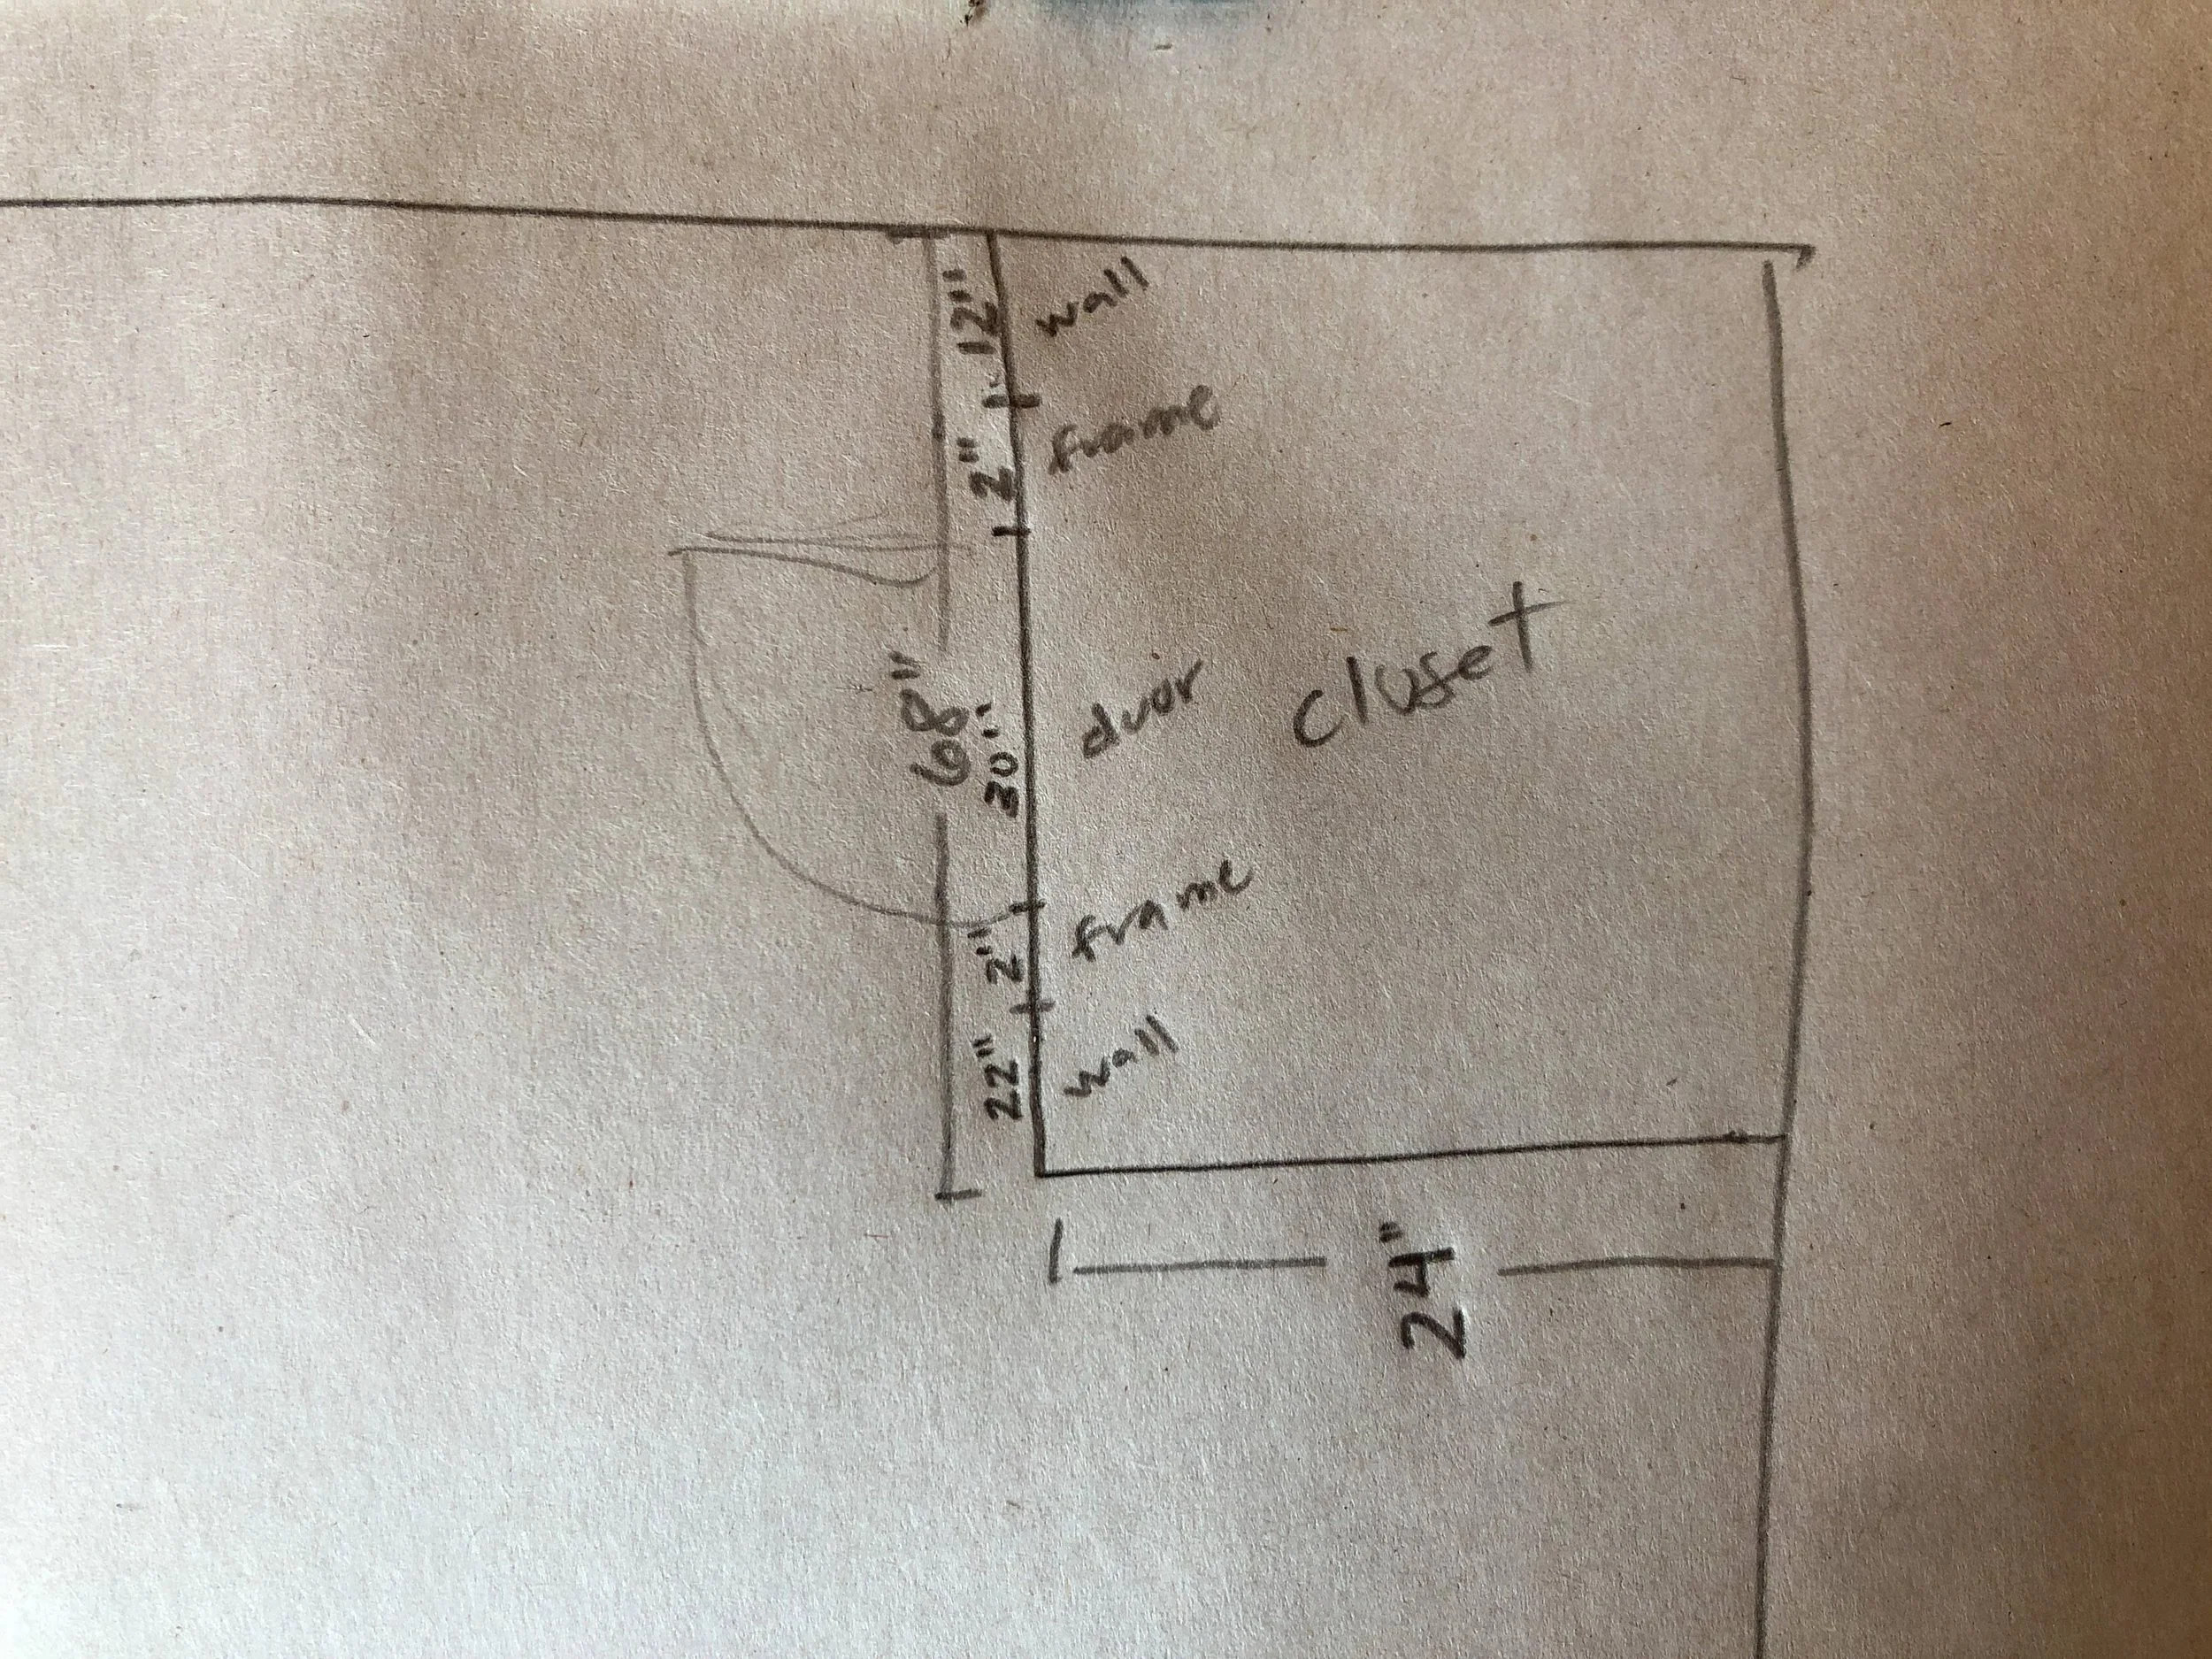
Measure Fixed Structure in the Space
Now that you have overall measurements of the space, let’s break it down into smaller measurements according to the fixed structures starting with doors.
Notice the doors in your room. Do they have door frames?
Measure the walls again from corner to corner this time breaking it down in segments. Make note of the distance from corner to door frame, width of the door frame, width of the door, the door frame again, and then to the corner again. If there are multiple doors, or other architectural features be sure to take as many measurements as you can. Write these down on the inside of your drawing. These numbers should add up to the numbers you wrote in the margins for the wall overall.
When making notes of measurements, it may be helpful to show the end points of what you’re measuring. You can show this with tick marks on either side of the number like this:
|-------4”-------|--------------8”--------------|-------4”-------|
Feel free to label what each segment represents, so you don’t forget.
Now do the same with windows. Even though they don’t usually touch the floor, let’s make notes about them here, because they’re a really important part of how we use to the space.
Repeat this with any other architectural or design feature or any appliance that’s fixed in the space, like a radiator.
Credit: Vibe Is Bright
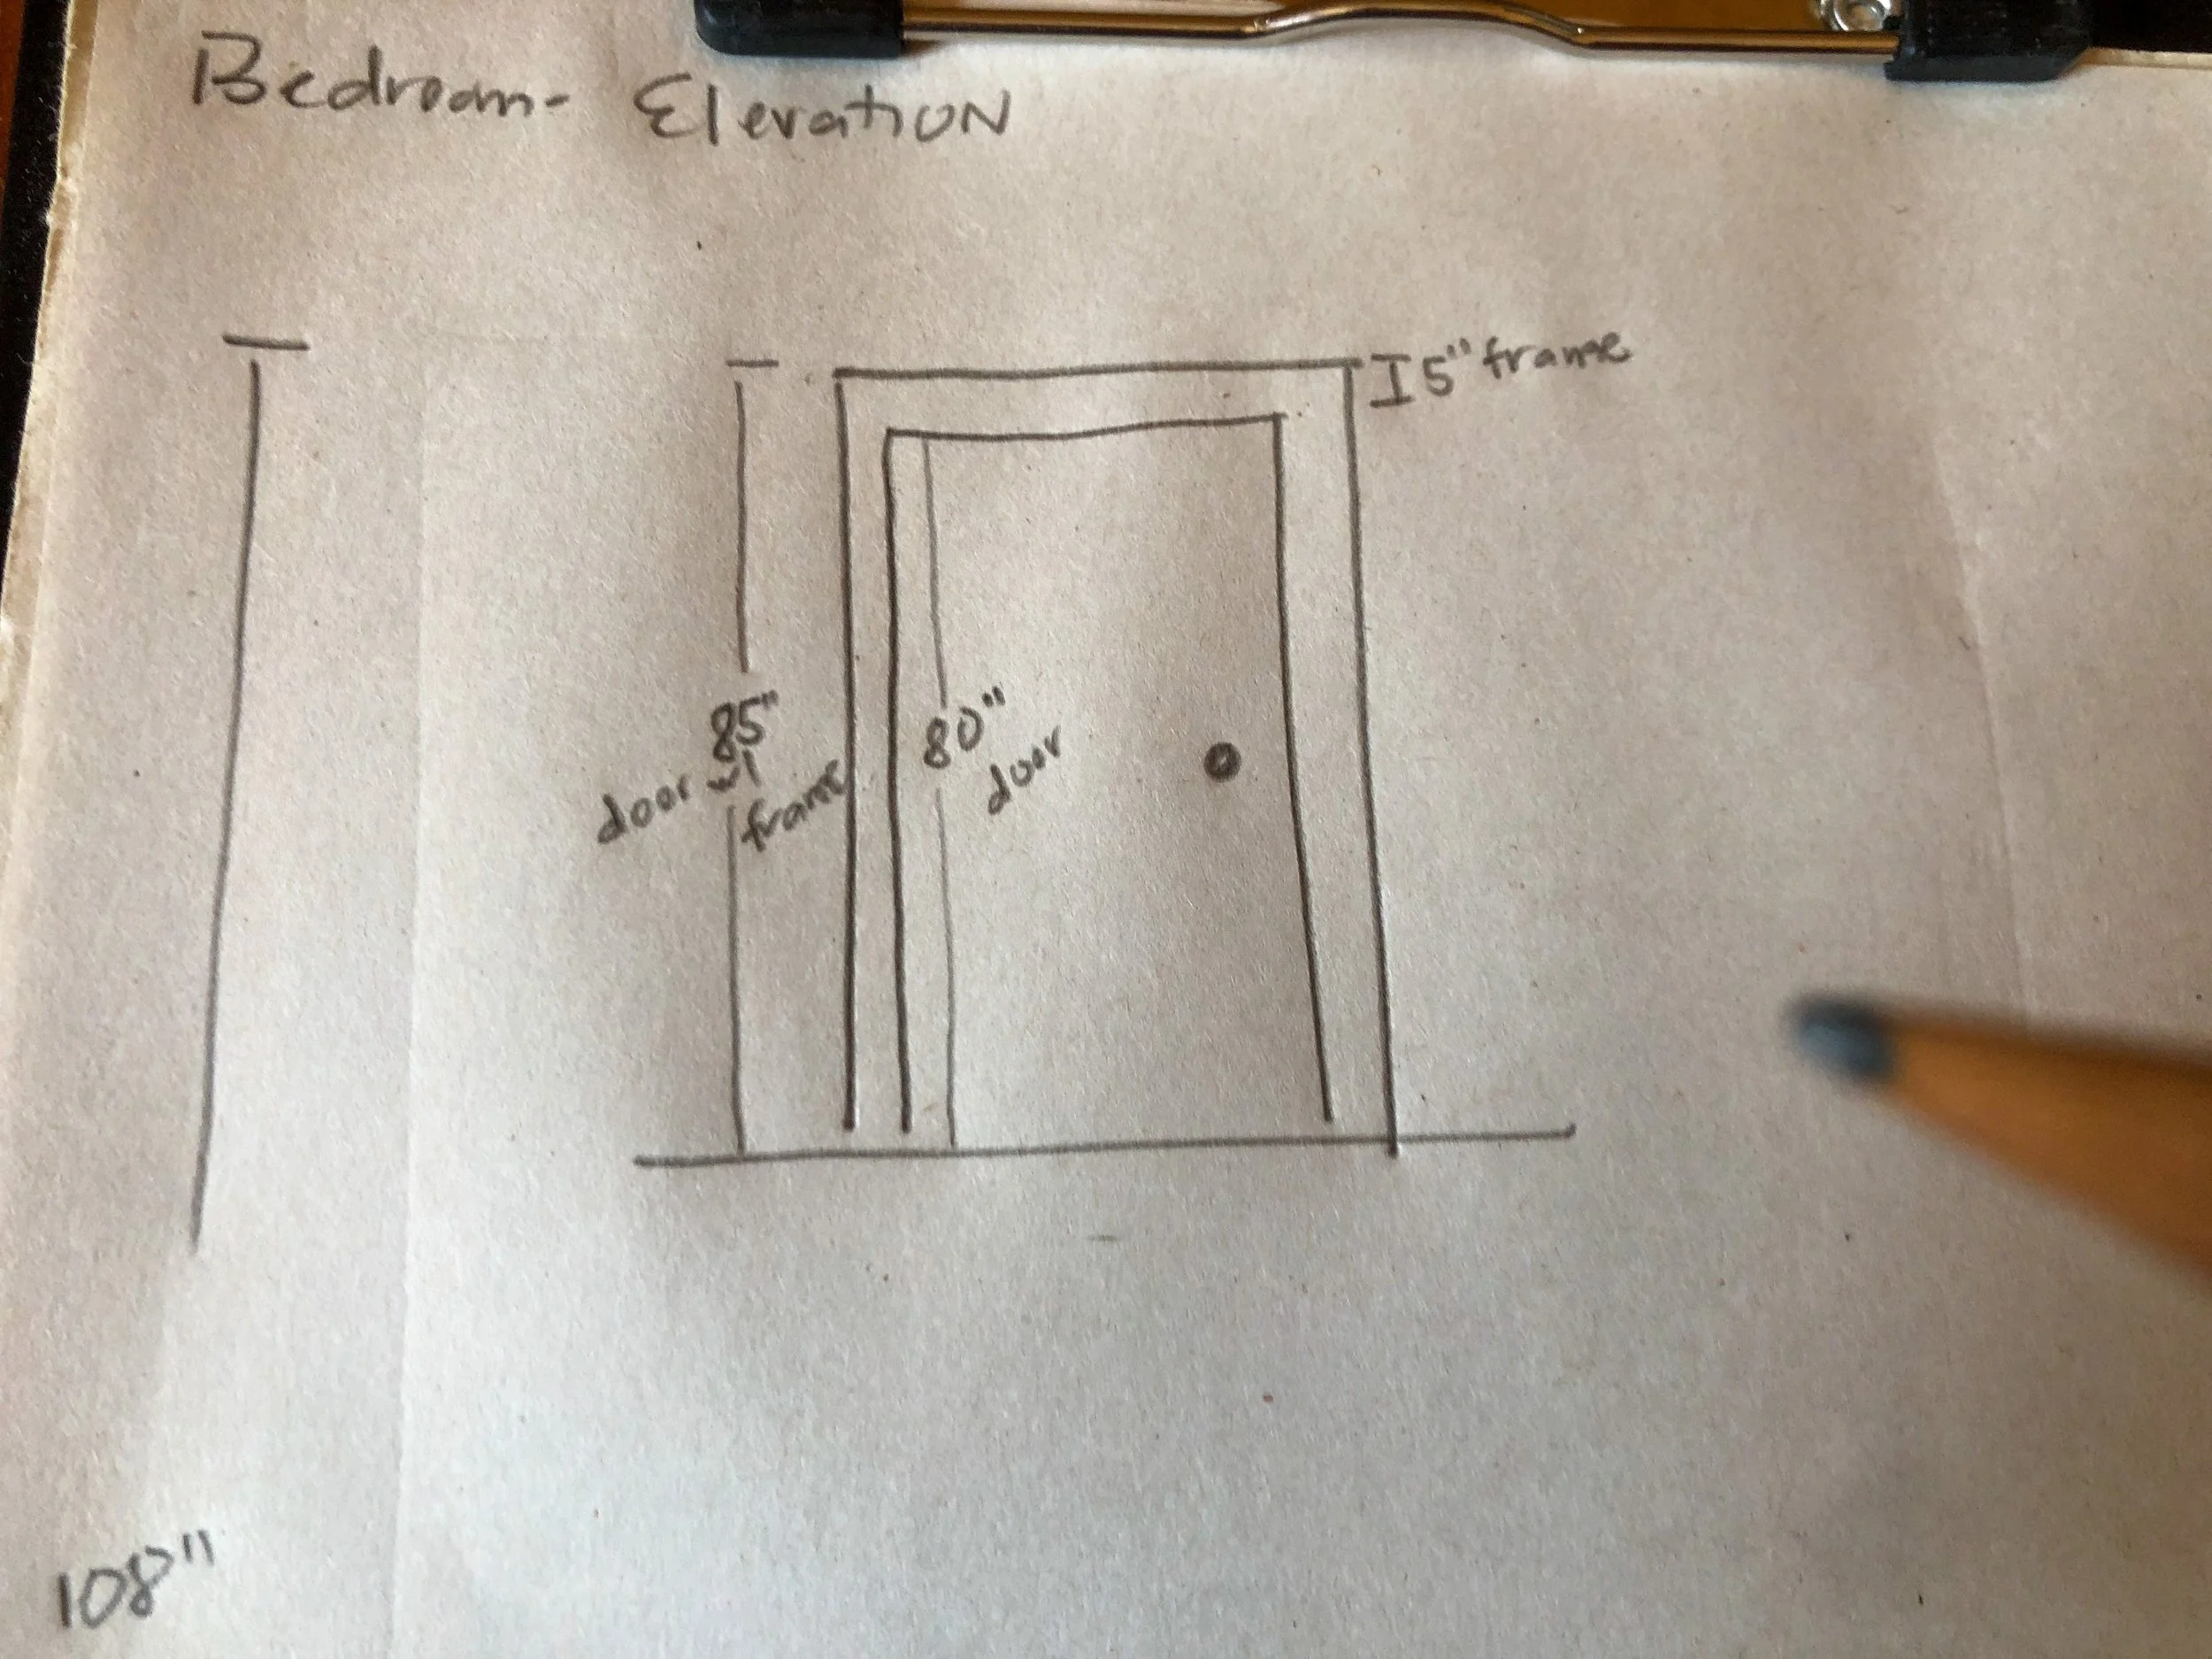
Create an Elevation Sketch with Measurements
Name a new sheet of paper “Room Name - Elevation.”
Now we need to focus on the height of the space and features that span elevation of the walls. On this sheet, you’ll have a few different quick sketches that don’t need to be to scale or placed anywhere in particular on the page.
Measure the height of the ceiling. Make note of it on your elevation.
Now let’s take a look at the doors and windows. You already have the width of these on your floor plan, so here let’s measure the height of them, including details like door or window frames.
It can be helpful to draw these general shapes on your sheet to assign measurements to.
Credit: Vibe Is Bright
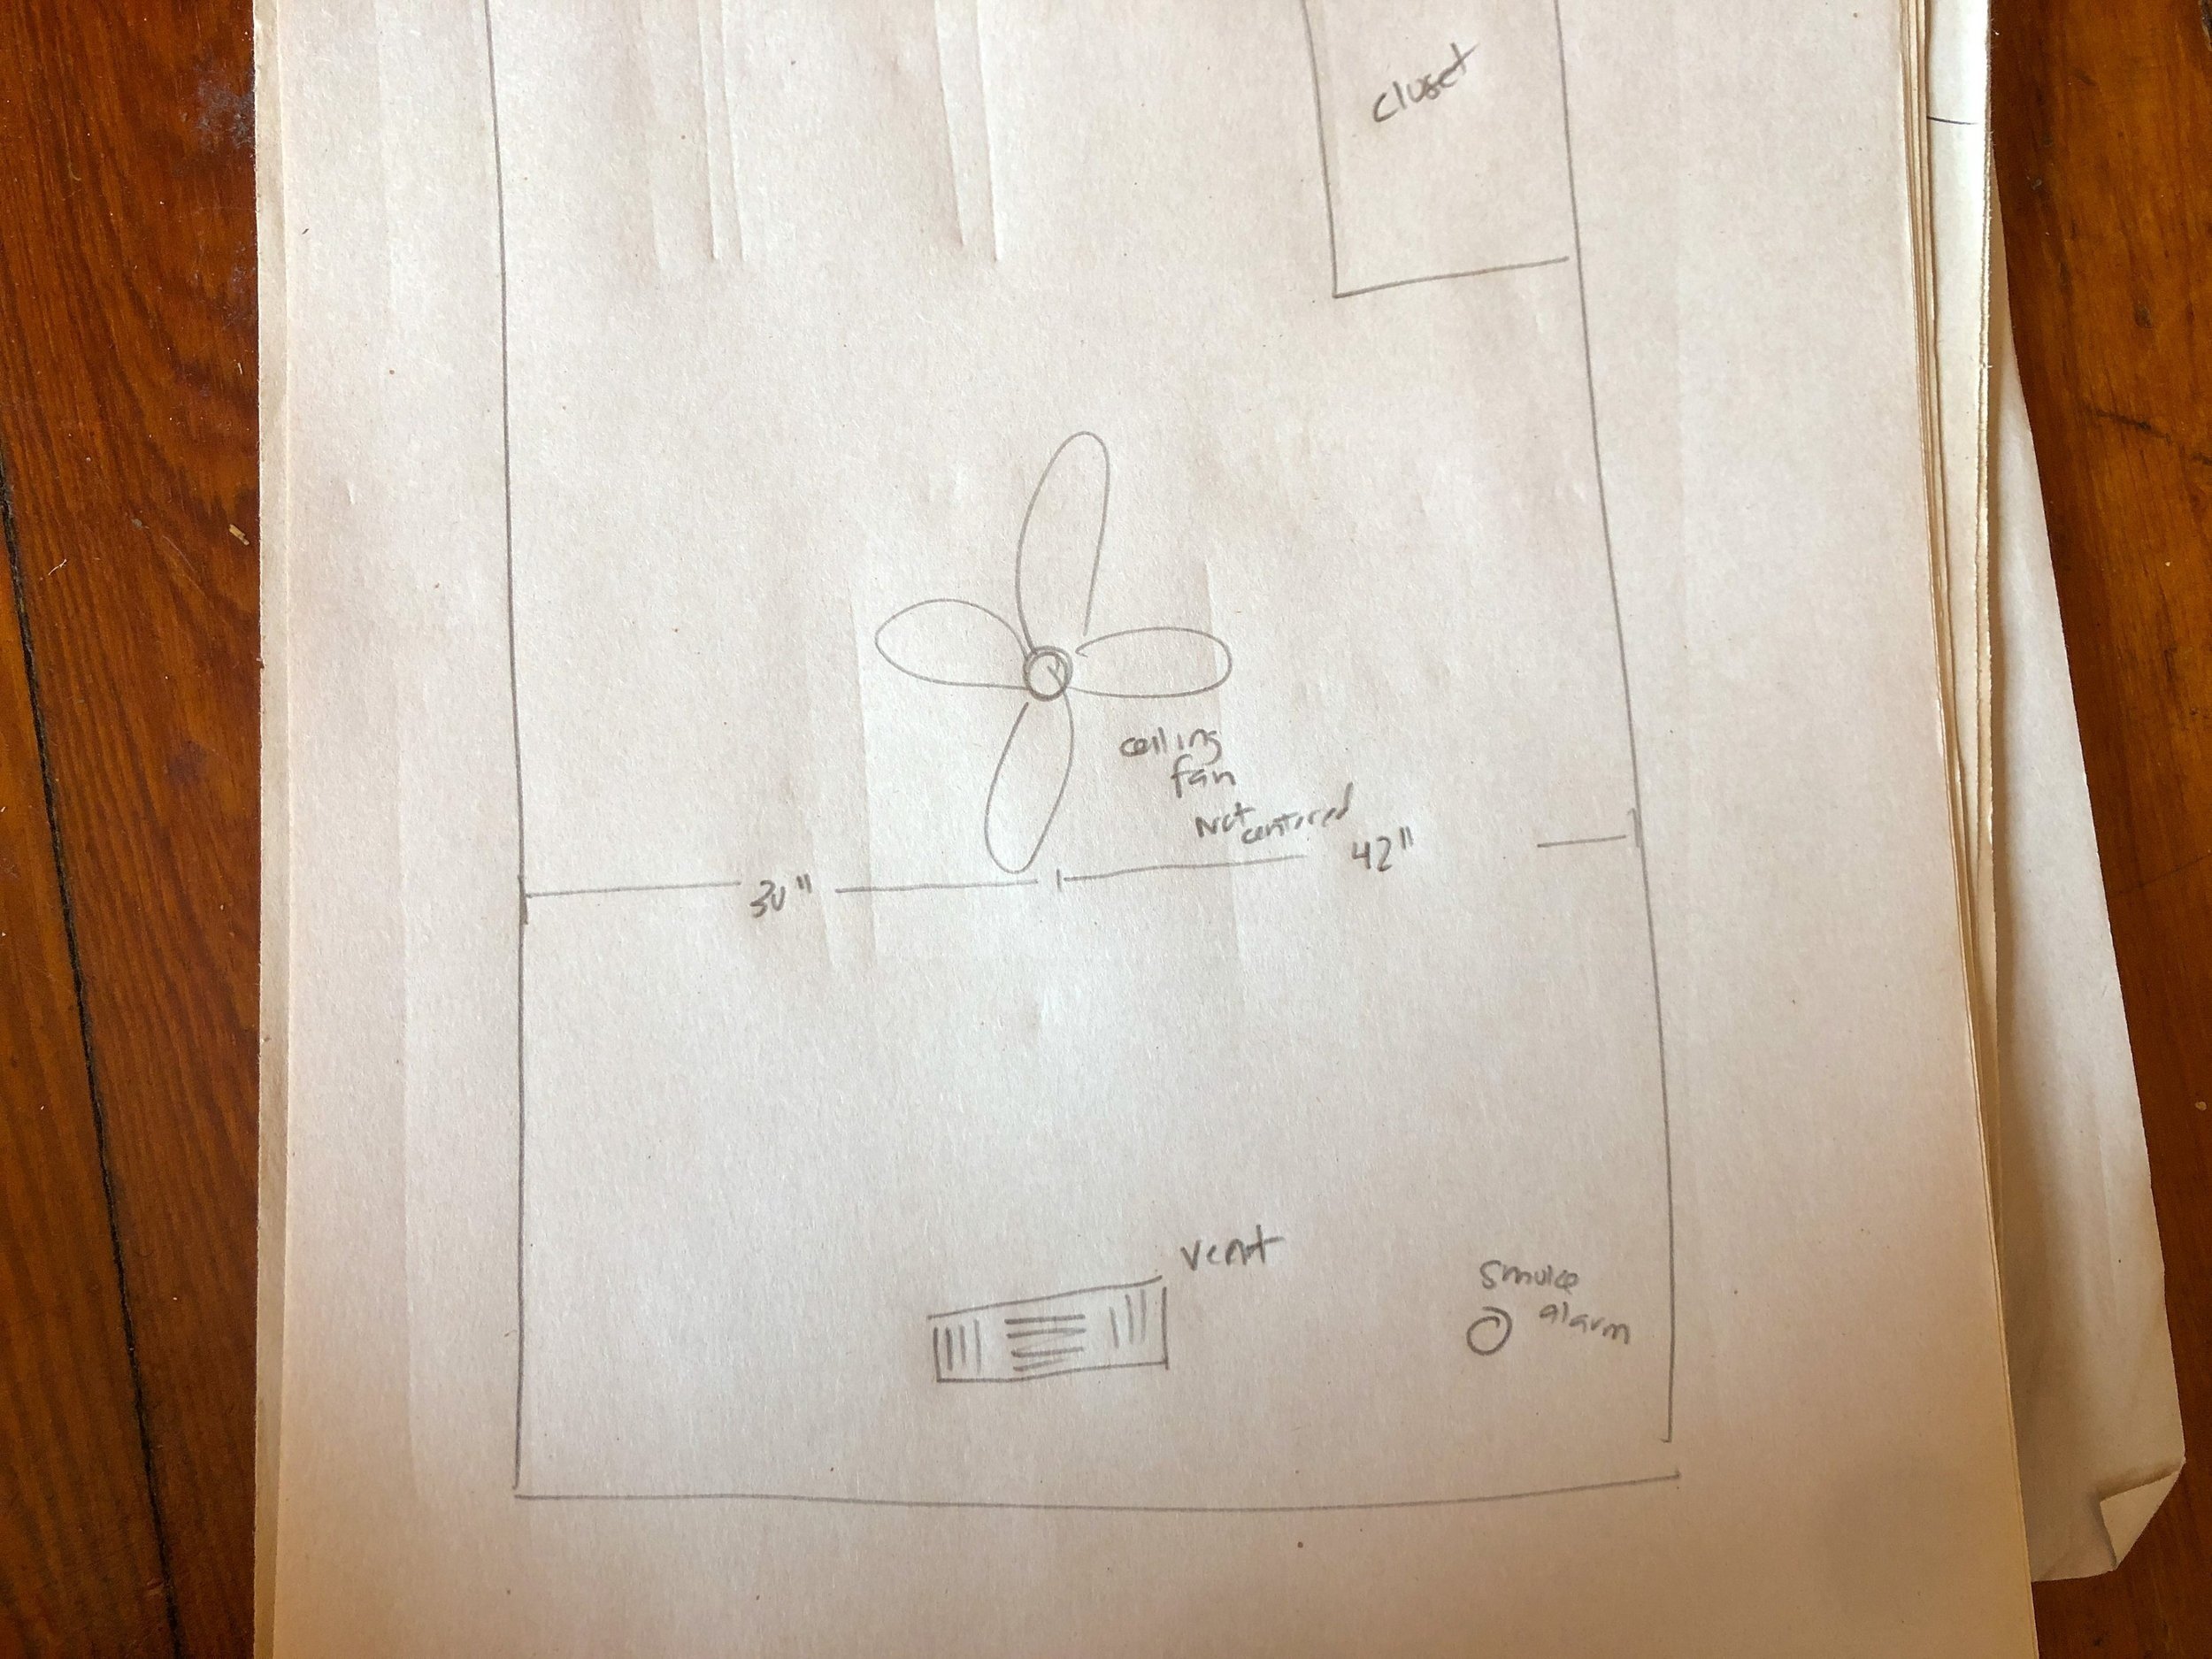
Create a Ceiling Plan with Measurements
Name a new sheet of paper “Room Name - Ceiling.”
Double check that the ceiling dimensions are the same as the floor. If so, redraw the general shape and write down the overall length and width.
Make note of any overhead lights, ceiling fans, air vents.
Make note of any architectural details or if the ceiling is raised or lowered anywhere.
Add these measurements to your ceiling plan.
Credit: Vibe Is Bright

Photograph Everything
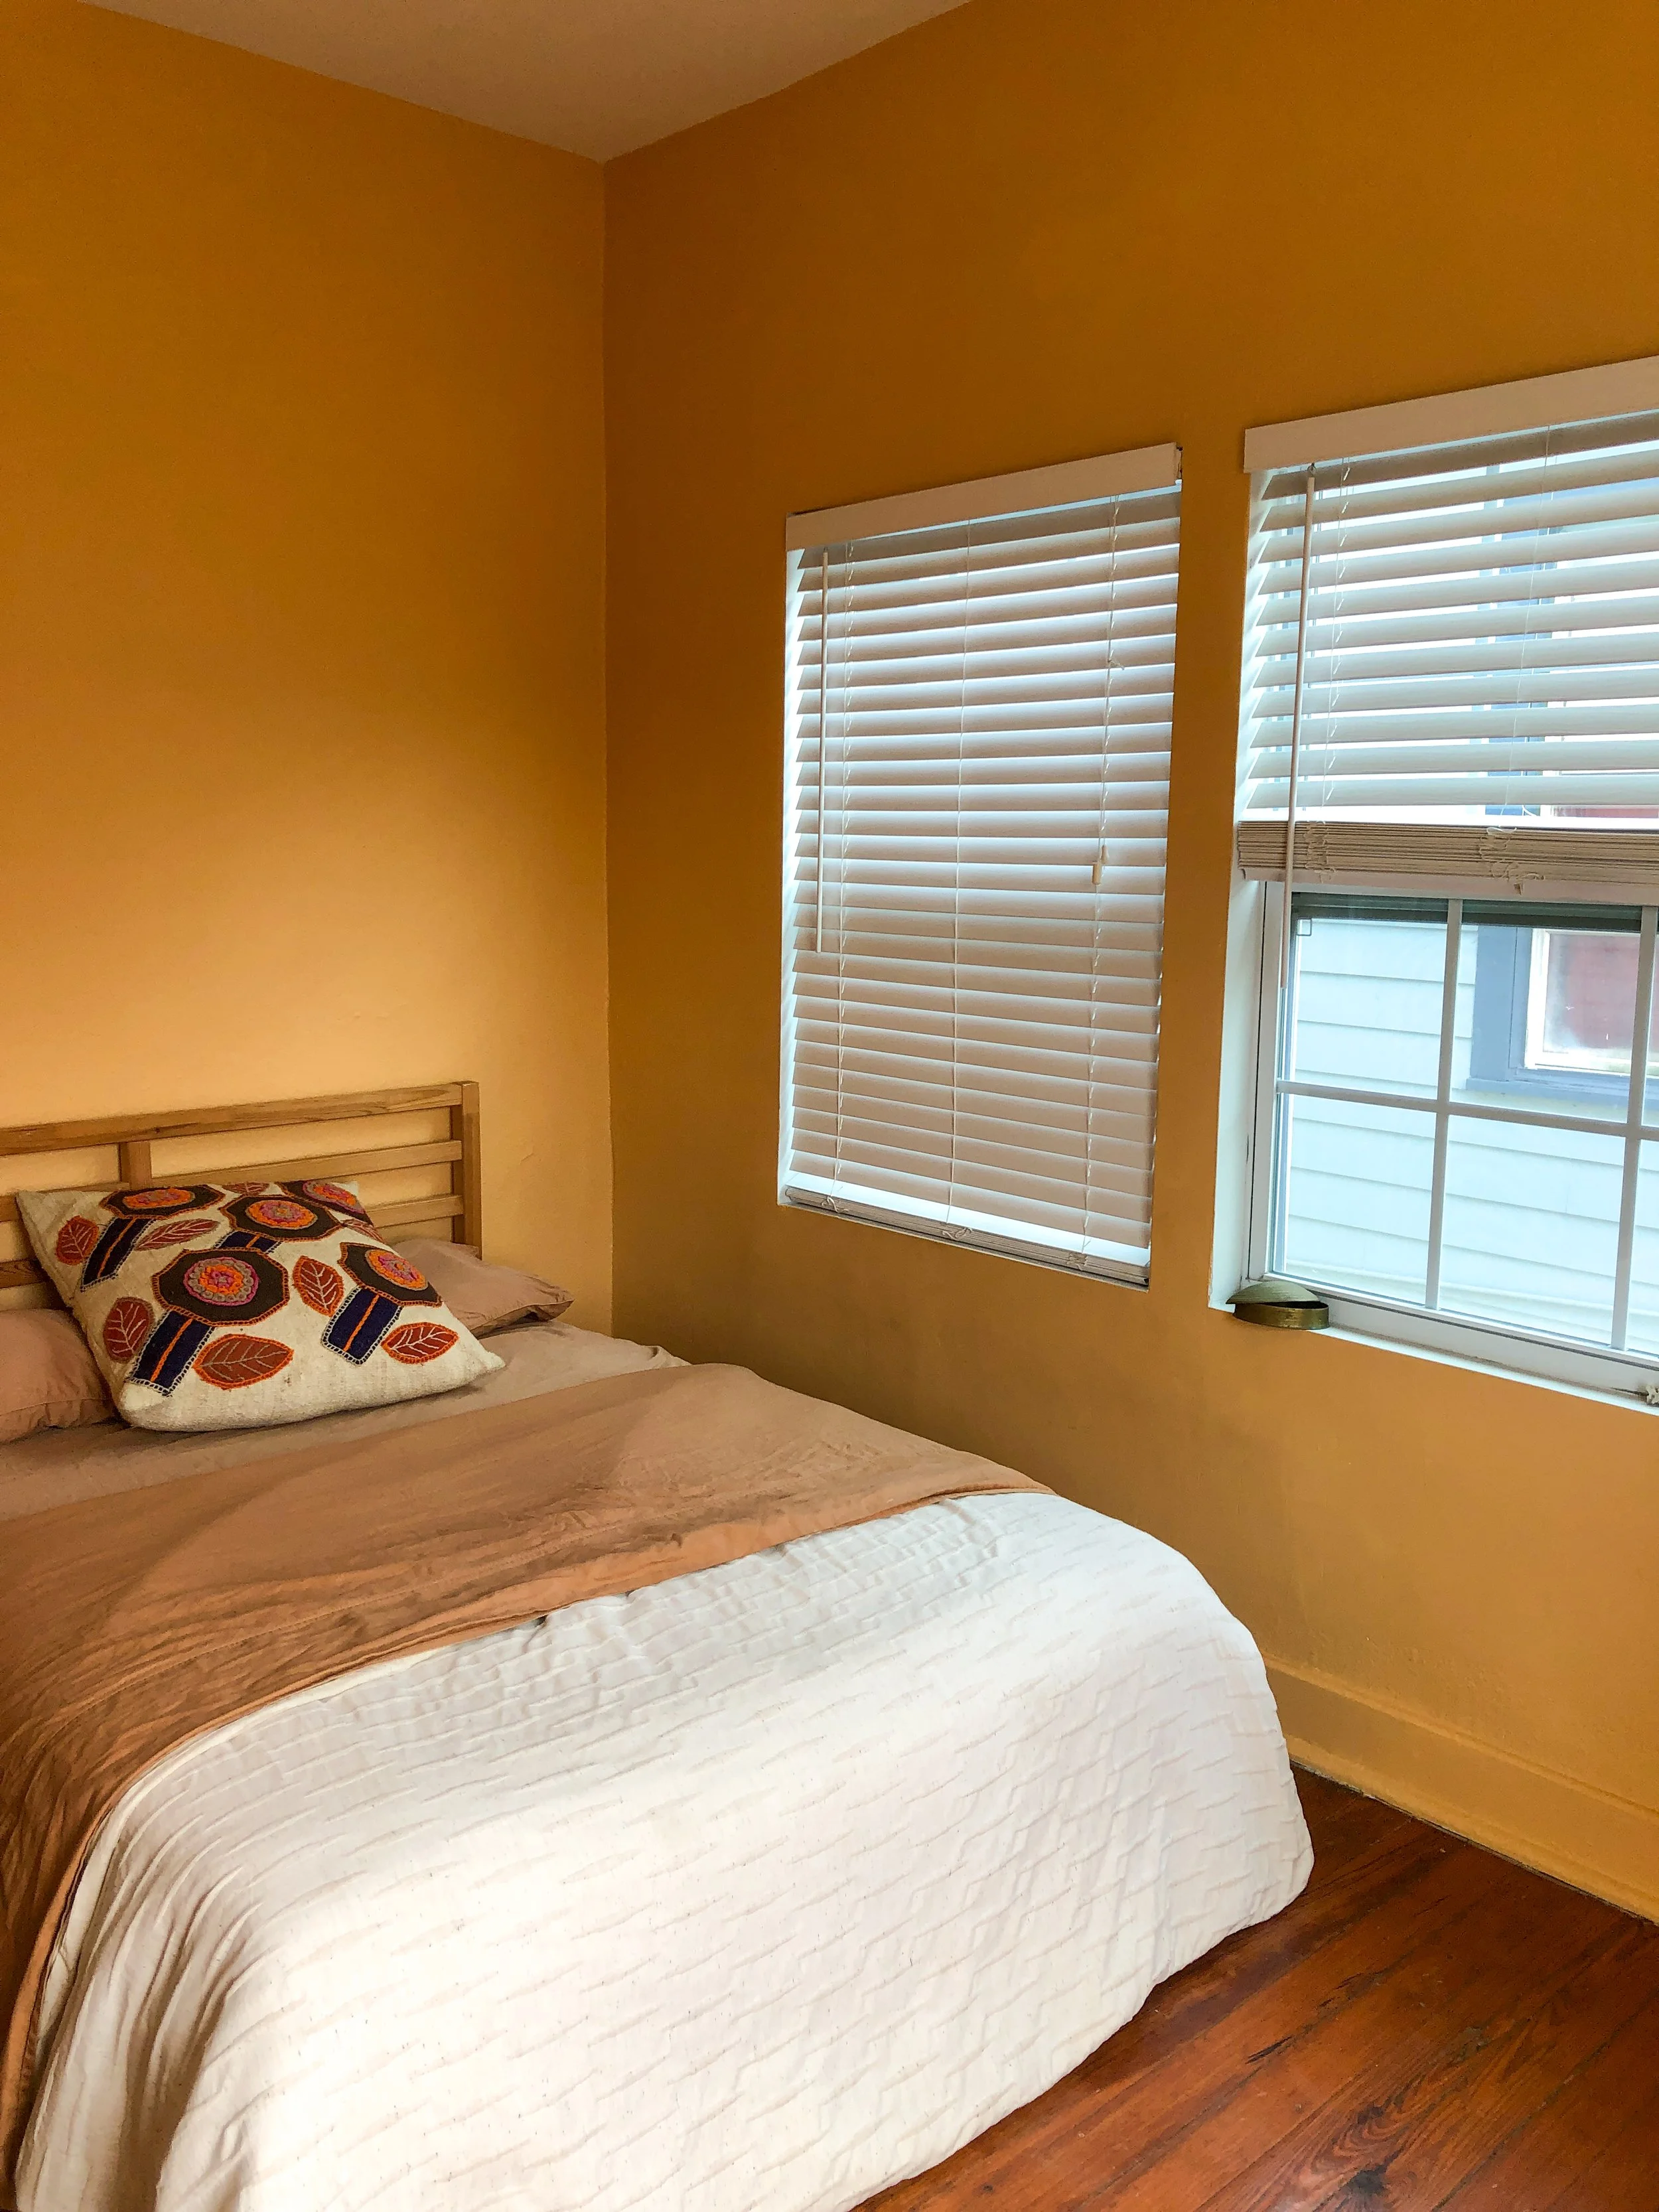
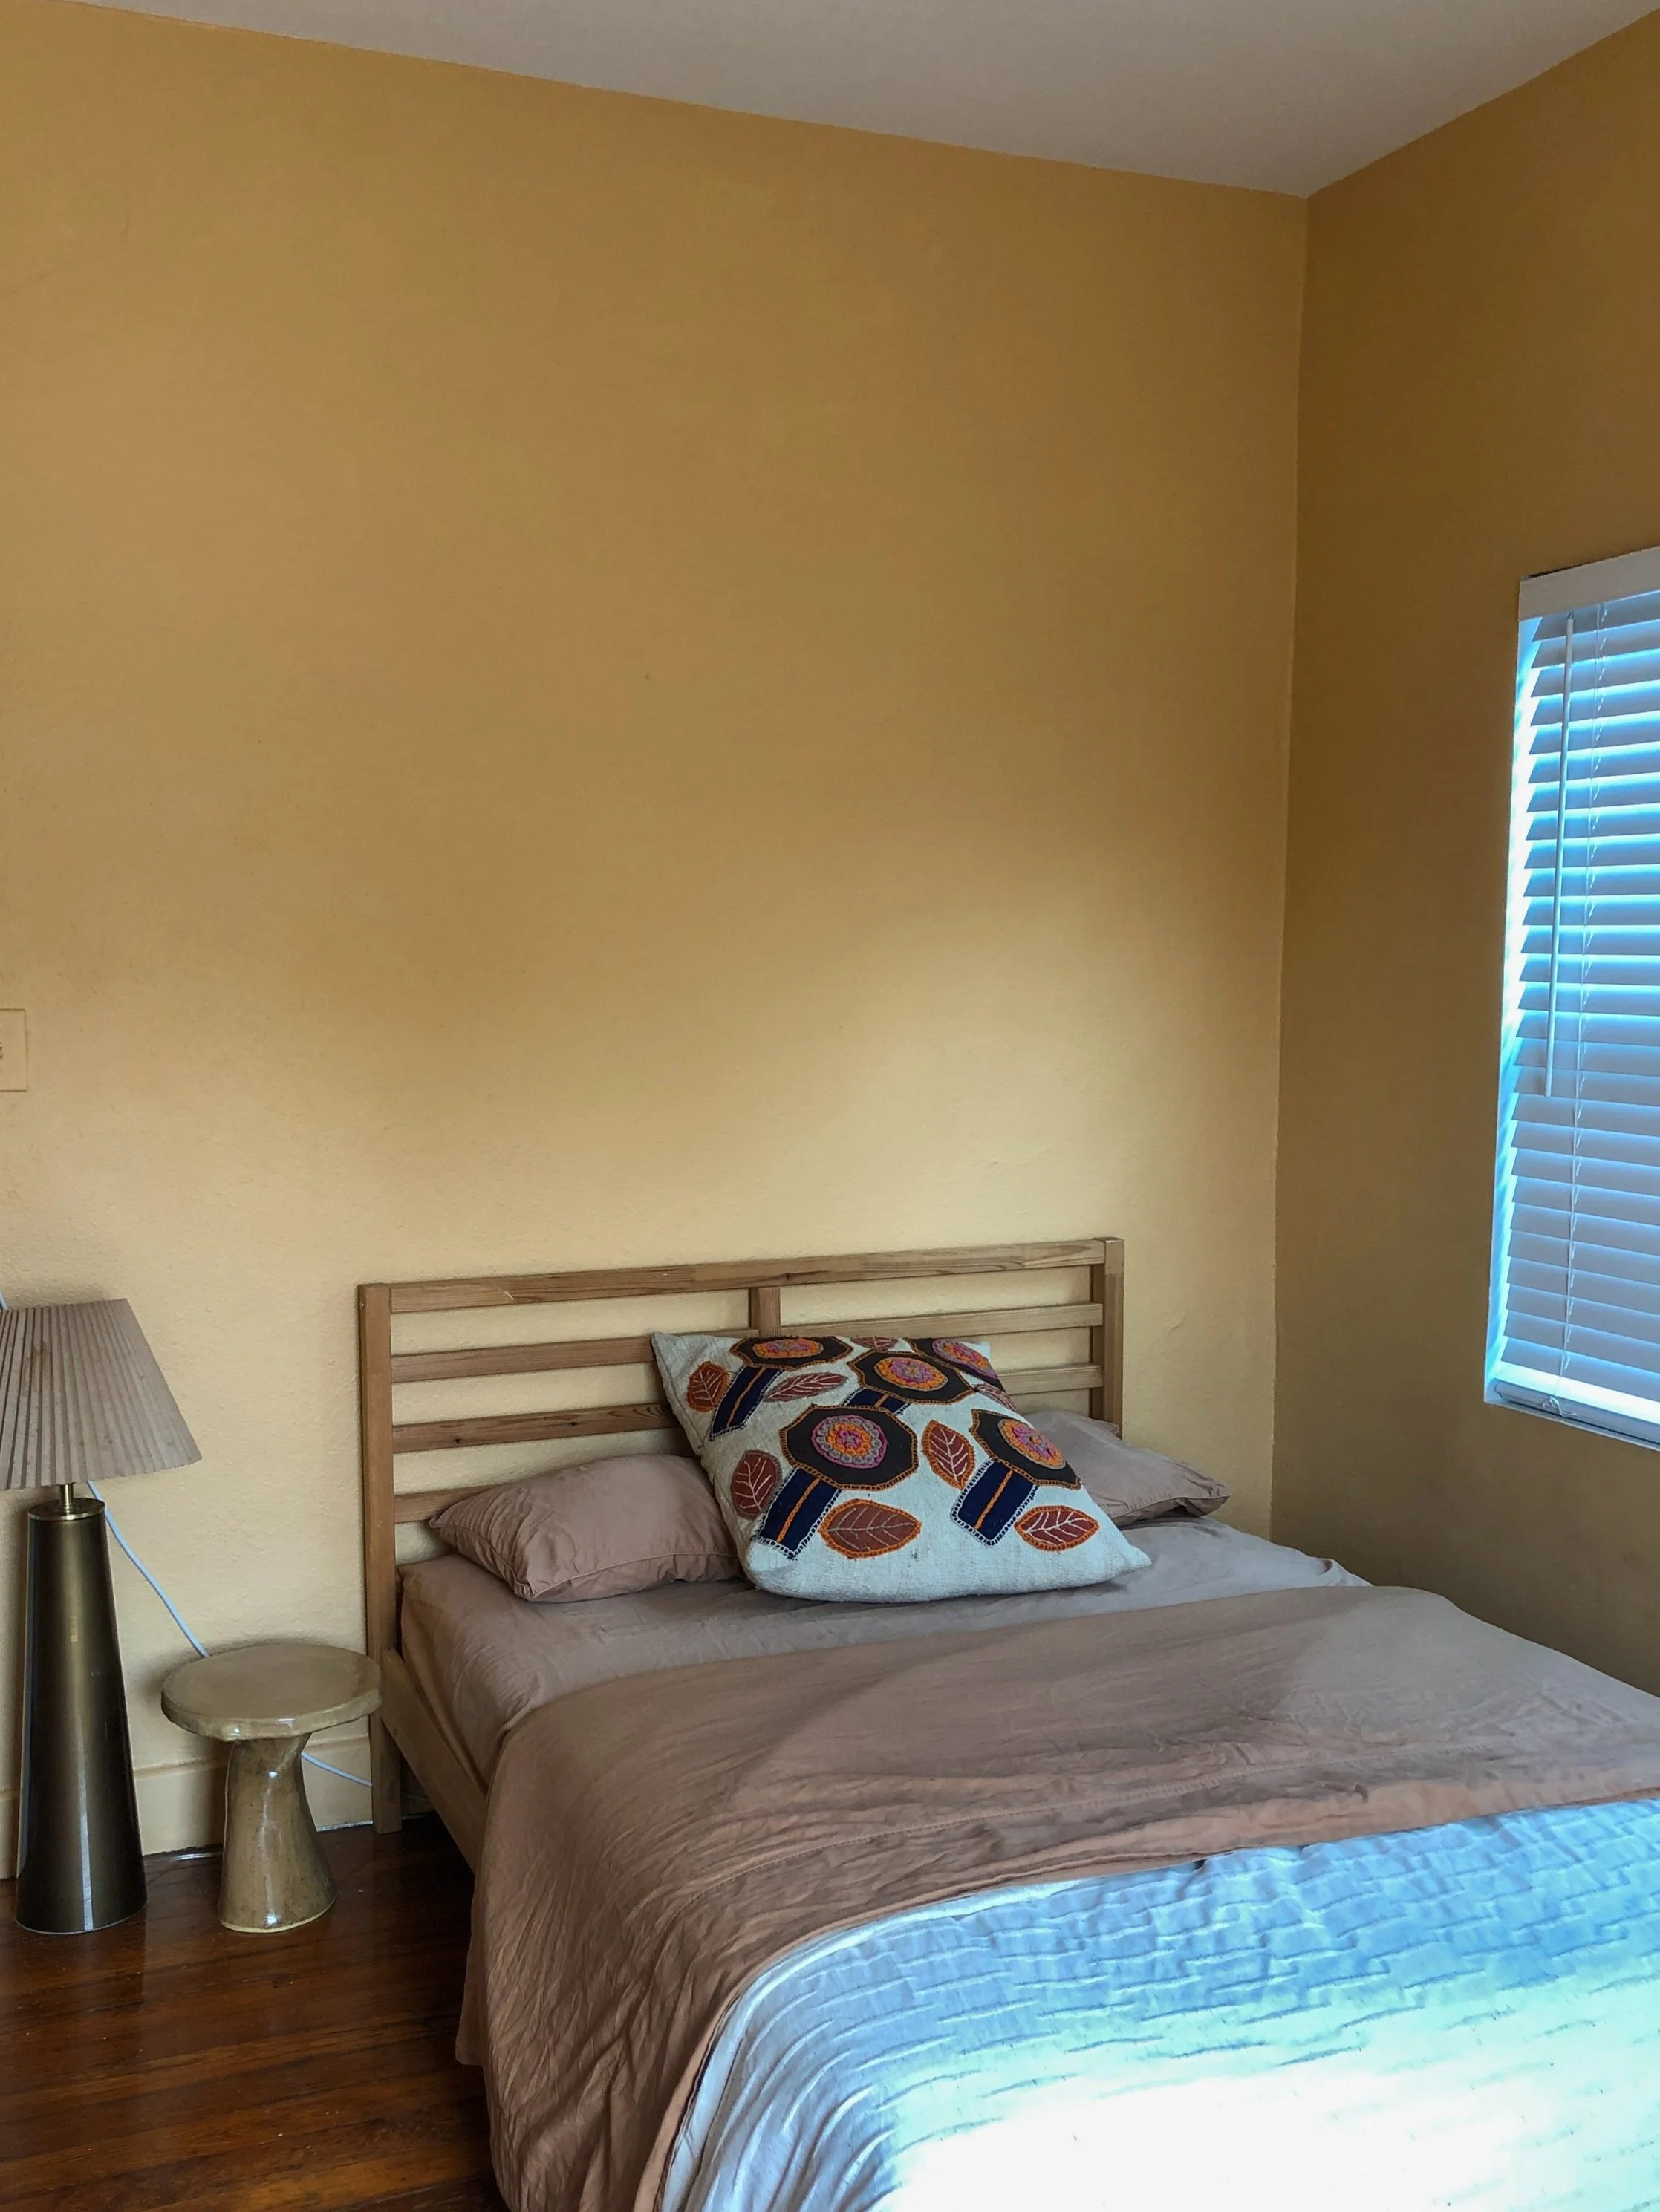
It’s always a good idea to photograph the space after you’ve measured just so you have a quick visual reference of what’s on your diagram. Even if your drawing is an A+ drawing, a picture is still worth a thousand words.
Take photos in two rounds. The first round will be zoomed out, wide angle shots aimed at getting as much in the frame as possible. Go around the room making sure to capture each wall floor to ceiling. You may have to step back into the opposite corner or set your phone’s camera to zoom out. More is more here. You can’t have too many.
The second round of photos is to capture details. Everything from outlets to light switches, your ceiling fan to baseboards.
Once you’ve taken photos, take a video with a full 360° view of the space. Go as slow as you possibly can, so you camera has a chance to focus. These video always save the day when you’re out in the wild shopping for furniture or trying to remember if your outlets have 2 or 3 prongs.
FAQs
-
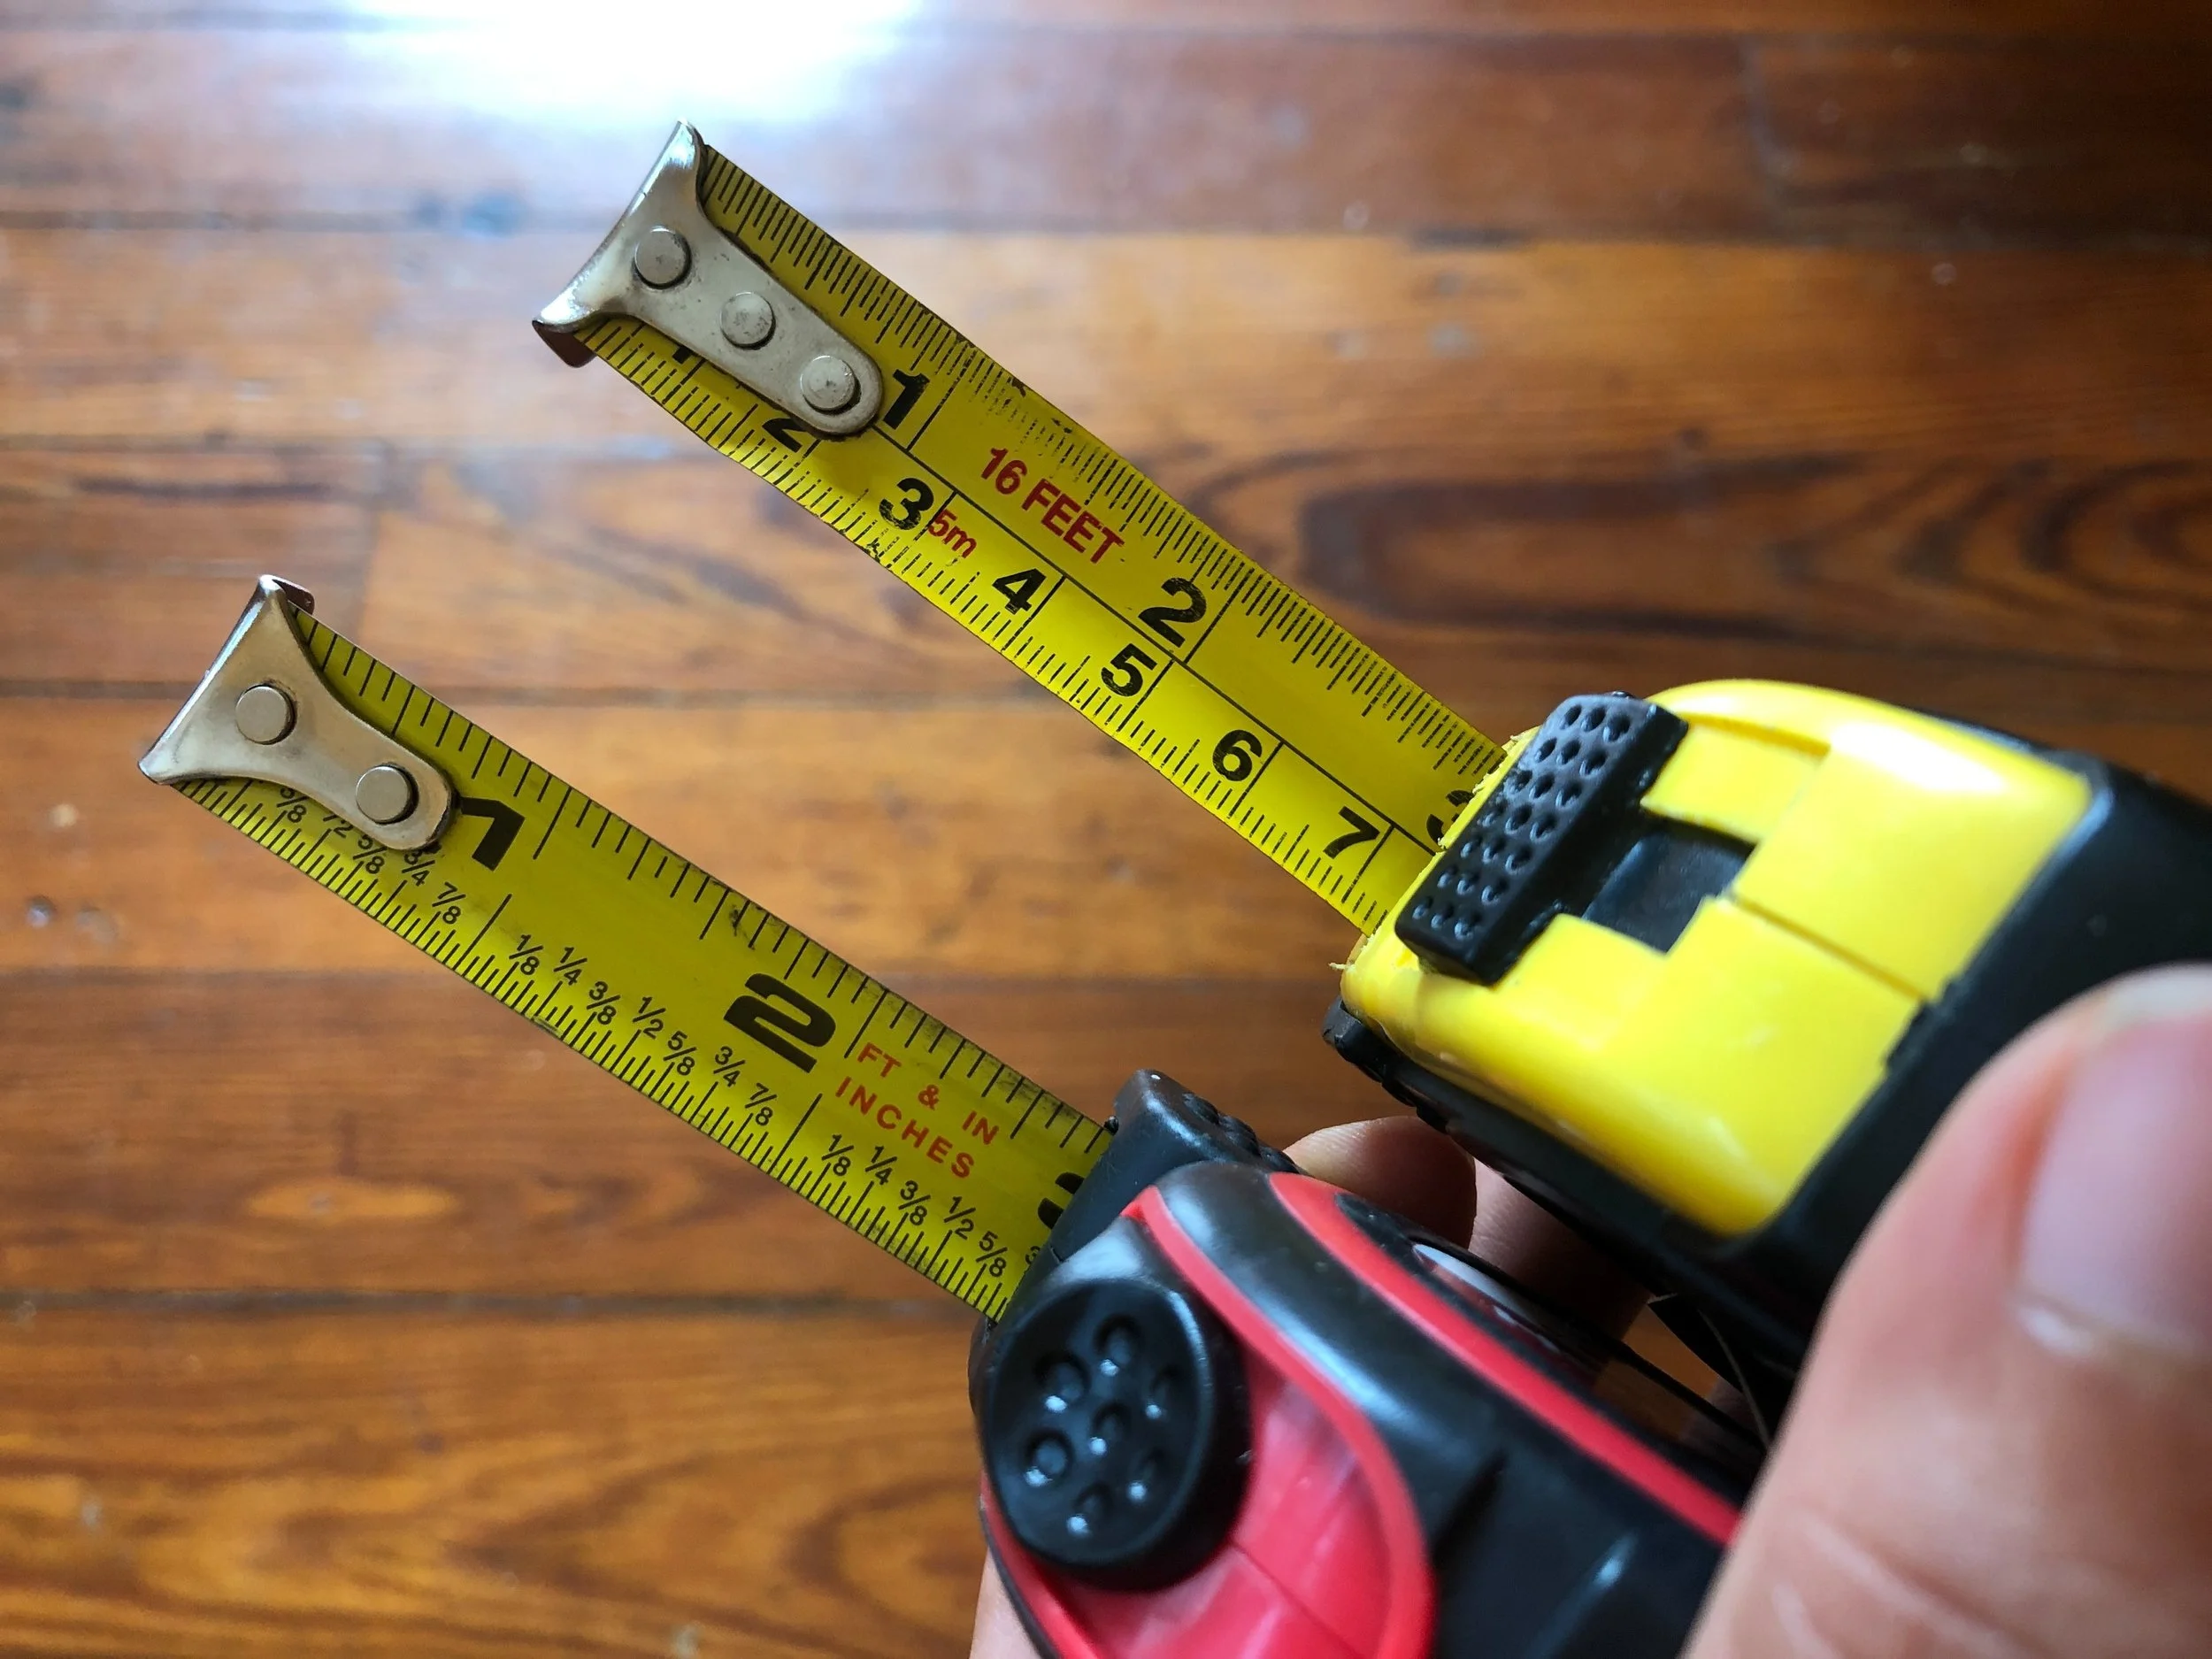
A measuring tape is one of those tools we’re never really taught how to use. For the most part it’s straight forward. Pull the tape out and measure. But did you know the mteal hook usually has a thickness of 1/8” and the wiggle room where it attaches to the tape is also 1/8”? That means if you use it as a hook around a door frame and pull out to measure, you’ll get the same measurement as if you push it up to a wall. Also you can use the plastic or metal housing that holds the tape as a quick measuring tool. The width of the housing often appears on its base for easy reference.
-
Pick your units. In the United States, the imperial measurement system is normally used on a tape and while it’s horrible, let’s stick with it here. Either measure everything in inches (ie. 6 1/2” and 92”) or feet and inches (0’6 1/2” and 7’9”). For any fraction of inches, write out the fraction in 1/8” increments (1/8”, 1/4”, 3/8”, 1/2”, 5/8”, 6/8” and 7/8”). The name of the game is consistency. This avoids confusion later.
-
If you want to know more about interior design for your space, sign up for a Discovery Call. We’ll get on a call, discuss your needs and wants and I’ll let you know how we can help. Most projects will start with a Design Consultation which will help us come up with a game plan for your design, whether it’s DIY projects or full service interior design.